 />
/> />
/>  />
/> 


I have quite a few updates to put in here...
Also just care to mention car 19 will be having a colour change..... it's gonna be white. Red engine bay, red and gold underside of bonnet and the rest white. Was originally going to go with a vintage white, but decided on a normal white. I am going to refinish the wheels (again) - they will be bronze. A bronze roll bar, retro black wing mirrors, black viper stripes and door roundels with 19 in them.
I was going to make my own ducktail but have decided against that (for now). But I am going to be making my own lip spoiler and rear lip spoiler.
What you put in, you'll get back ten fold
***** THIS IS VERY IMPORTANT TO THE SITE AND HELPING YOU,OTHERWISE IT CLOSES AND ALL THIS ON LINE GARAGE IS GONE FOR GOOD*****
Greetings and welcome to menders, this site was built for every owner that might need her to help keep those bills low and also keep them on the road where they belong, she is run by very passionate enthusiasts owners for passionate enthusiastic owners, see her like a on line garage, there is a lot of tech stuff hopefully explained for everyone to use, if there is something you cannot get your head around, or you feel that there is a strong walk through guide missing that needs creating by one of us or from yourselves, please let us know, we are also on false book and youtube, which as short tech vids to help, and again if you feel there is a vid that would help please get it touch.
the menders is free, but like everything there is a cost to run things and bills( we are just happy its not a heating cost), so if we have saved you hundreds, please throw a small donation in the pot so we can keep on going to carry on helping others in the same way .
*** we are currently looking for a sponsor for this year, so if you have the passion and can see this sites worth to everyone , please get in touch and step forward to help***
And thank heavens that we are now on the way back up the brighter ,warmer longer days, "come on summer", and lets see those project builds.
M-m
Car-19 and the road to recovery
Re: Car-19 and the road to recovery
Regards, Hammy.
1990 Eunos 1.6 Classic Red, soon to be a different colour
1990 Eunos 1.6 Classic Red, soon to be a different colour
-
Mazda Mender

- Site Admin
- Posts: 15097
- Joined: Tue Dec 06, 2011 6:18 pm
- Location: Pie land, in the glen of Wiganshire
- Contact:
Re: Car-19 and the road to recovery
Hamish wrote:black viper stripes


M-m
The Disclaimer:-
This post is a natural product made from recycled electrons. The slight variations in spelling and grammar enhance its individual character and beauty and in no way are to be considered flaws or defects, the articles/answers/comments are provided for information purposes and they are not intended to substitute informed professional advice, I or mazdamenders.net cannot personally be hold responsible for any damage occurred from following this procedure or any injuries from it. Proceed at your own risk.
Mk 1 Eunos 93 black V.S II 1.8 ,
Mk 2 .1/4 Roadster 99 black & gold V.S 1.8 .
Mk 1 Eunos 90 1.6 soul red ..f/ build
MK 2.1/4 Blue V.S Roadster 1.8 99 ..
MK1 1.8 ,white import.. (Ashleighs)
MK1 1.6 yellow J ltd import.f/build
MK 1 1.8 black Tokyo Ltd..f/build
http://www.mx5oc.co.uk/ http://www.mx5nutz.com/forum/ http://miata.net/ http://www.autolinkuk.co.uk/

Re: Car-19 and the road to recovery
Sounds nice buddyEunos 1.6 special 1989 with a few added extras
Eunos 1991 1.6
Eunos 1990 1.6 project
Mk2 1999 1.8
Eunos 1991 1.6
Eunos 1990 1.6 project
Mk2 1999 1.8

Re: Car-19 and the road to recovery
Hey Hamish, just wanted to say what a brilliant post this is! Have just read it all (I say read, read a bit, and looked at the pictures ;-) what an exciting project. Can't wait to see the finished car - Christine if that's still her name 
Hayley
Hayley
Re: Car-19 and the road to recovery
Oily updates...
I got to spend some time in my cage today. In fact been there all day and most of the evening. Lots of jobs done. Makes a nice change to spend some time back on the oily bits and spanners.
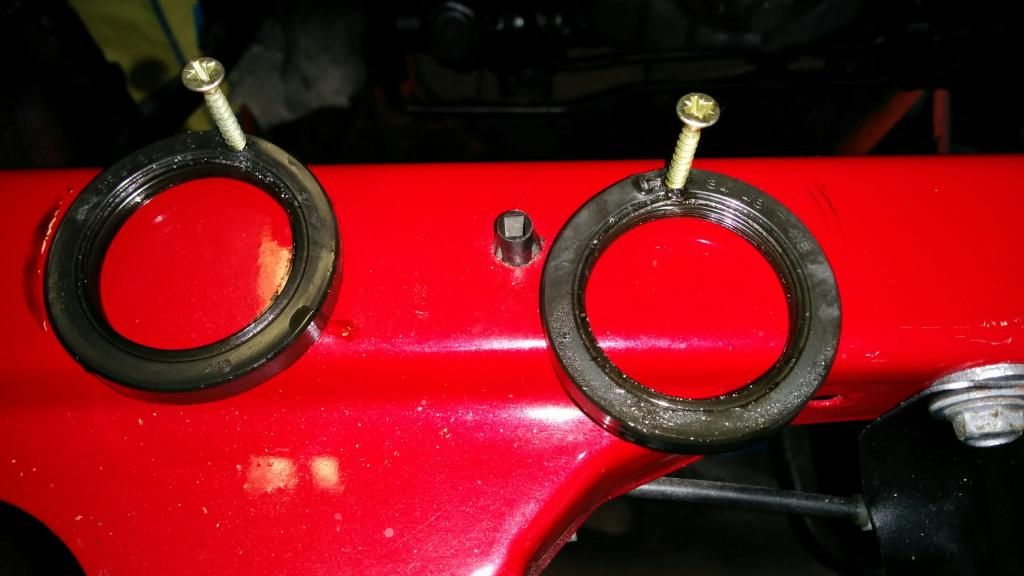
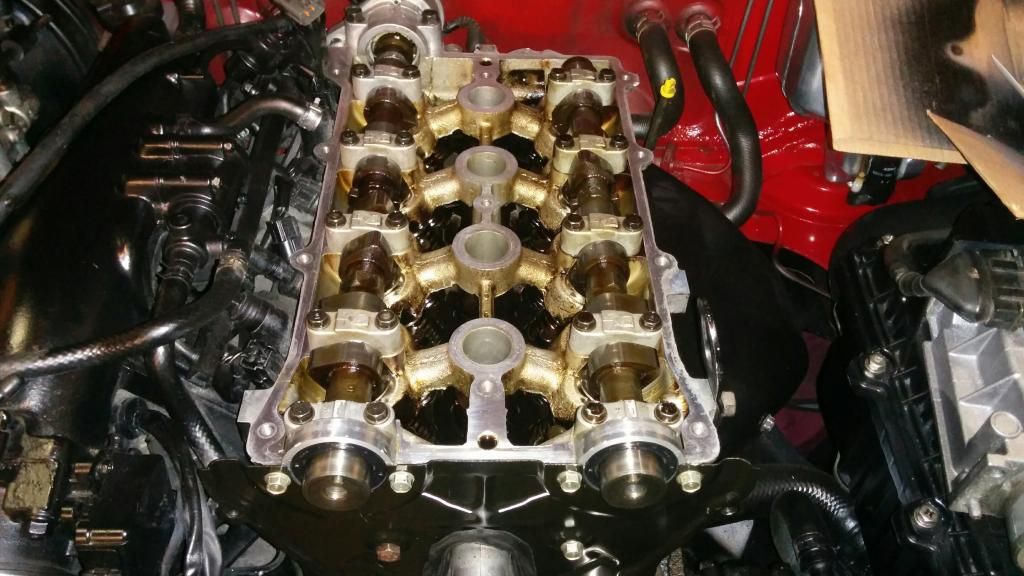
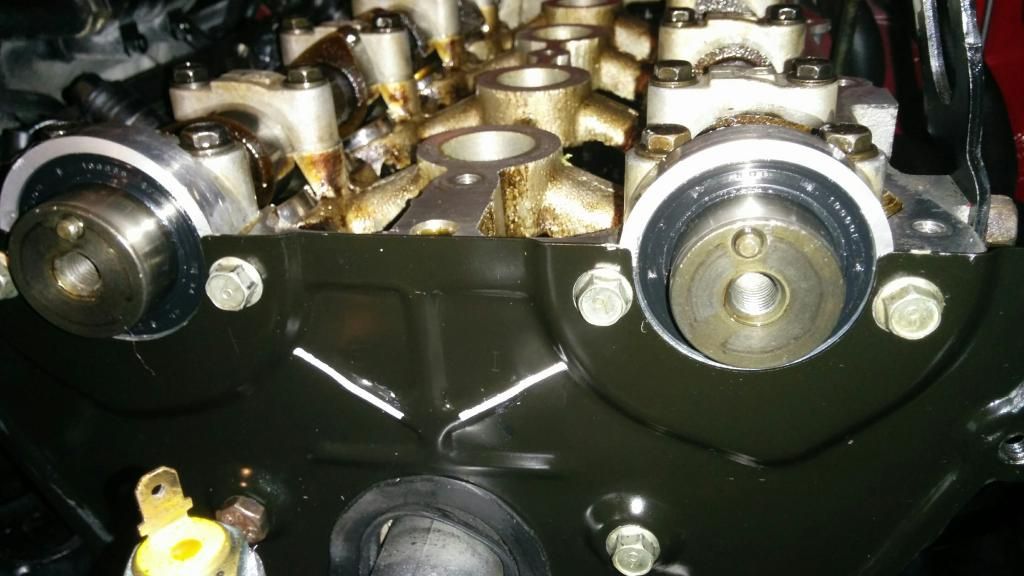
The other day I had the car started for the first time in nearly 16 months. Tappety - and a little too loud on one of the hla's I figured. So, lets strip it down. I needed to do it anyway as I suspected the cam seals where leaking. As I could'nt get the cam caps off, I had to resort to doing this to get the cam seals out so I could them get the cam caps off:
Worked a treat...drill a small hole - very slowly just to break through the metal and put a self tapper in:
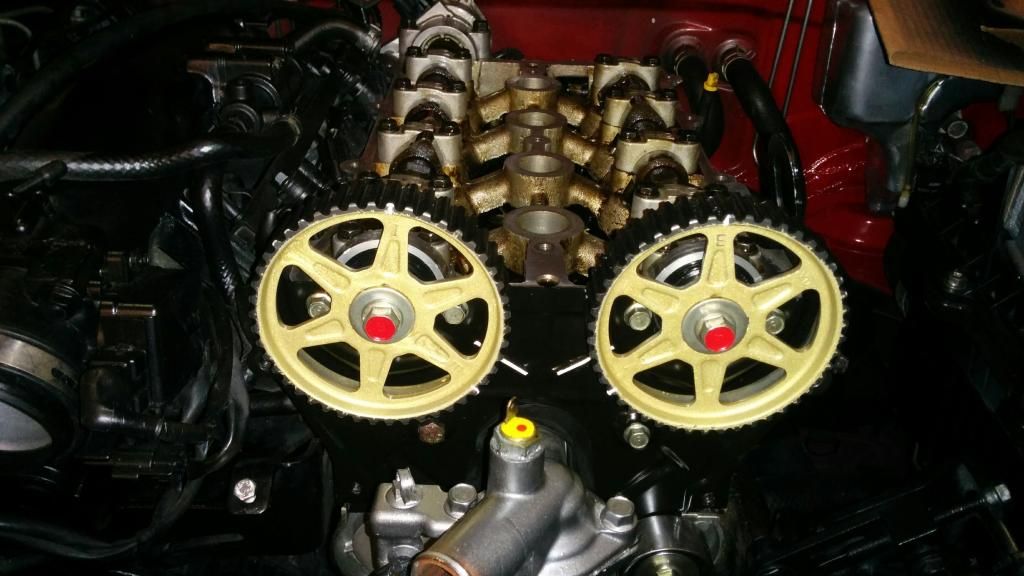
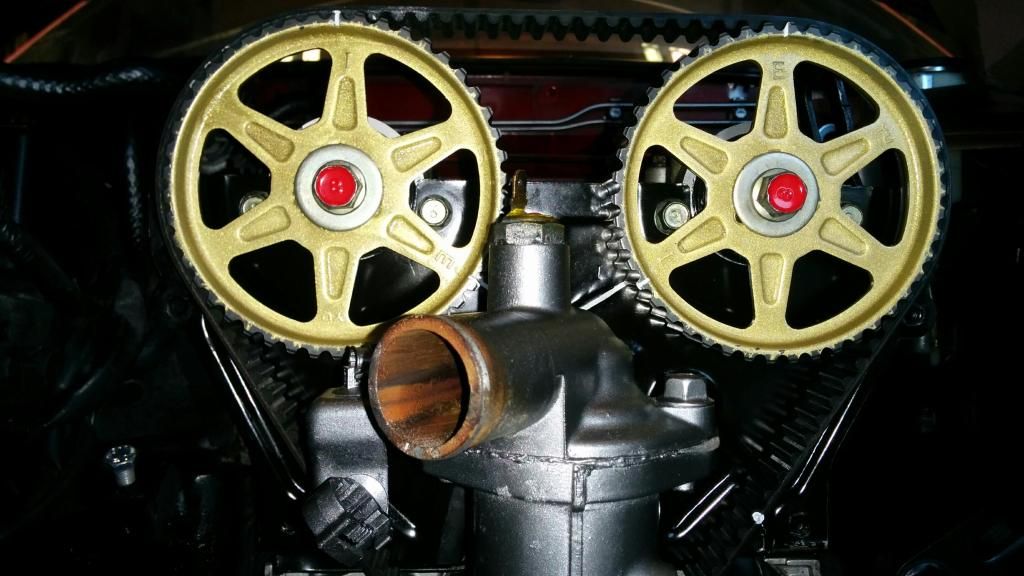
Cleaned the gears up and gave them some gold treatment
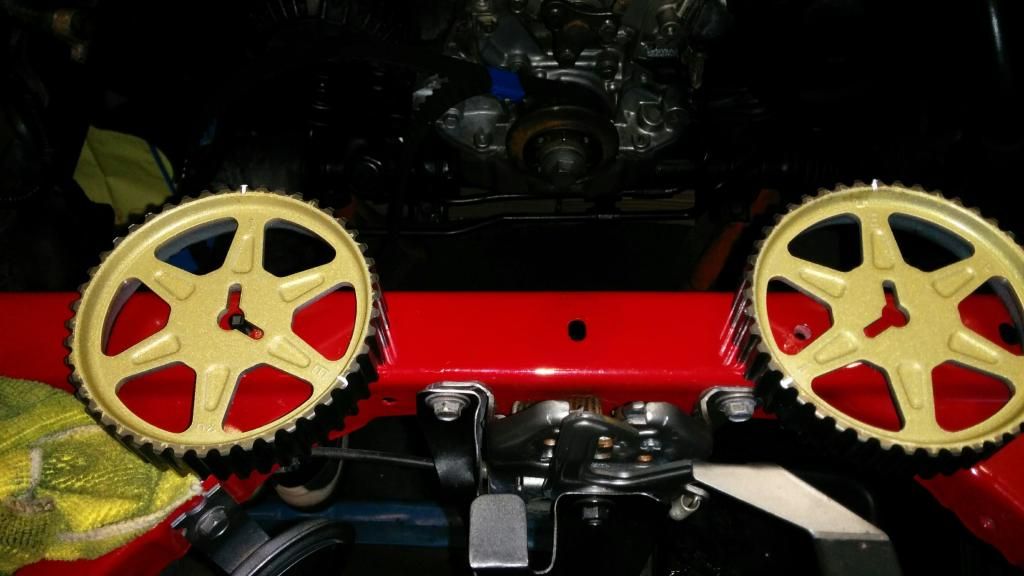
Head looks good for 169K Km. Sorted out the mess that was the front of the engine - all covers have been sanded and painted and timing marks painted.... Pulleys done - spit and polish. Water pump and timing belt are already done, so not replacing them.
So onto the HLA's.....
I got to spend some time in my cage today. In fact been there all day and most of the evening. Lots of jobs done. Makes a nice change to spend some time back on the oily bits and spanners.
The other day I had the car started for the first time in nearly 16 months. Tappety - and a little too loud on one of the hla's I figured. So, lets strip it down. I needed to do it anyway as I suspected the cam seals where leaking. As I could'nt get the cam caps off, I had to resort to doing this to get the cam seals out so I could them get the cam caps off:
Worked a treat...drill a small hole - very slowly just to break through the metal and put a self tapper in:
Cleaned the gears up and gave them some gold treatment
Head looks good for 169K Km. Sorted out the mess that was the front of the engine - all covers have been sanded and painted and timing marks painted.... Pulleys done - spit and polish. Water pump and timing belt are already done, so not replacing them.
So onto the HLA's.....
Regards, Hammy.
1990 Eunos 1.6 Classic Red, soon to be a different colour
1990 Eunos 1.6 Classic Red, soon to be a different colour
Re: Car-19 and the road to recovery
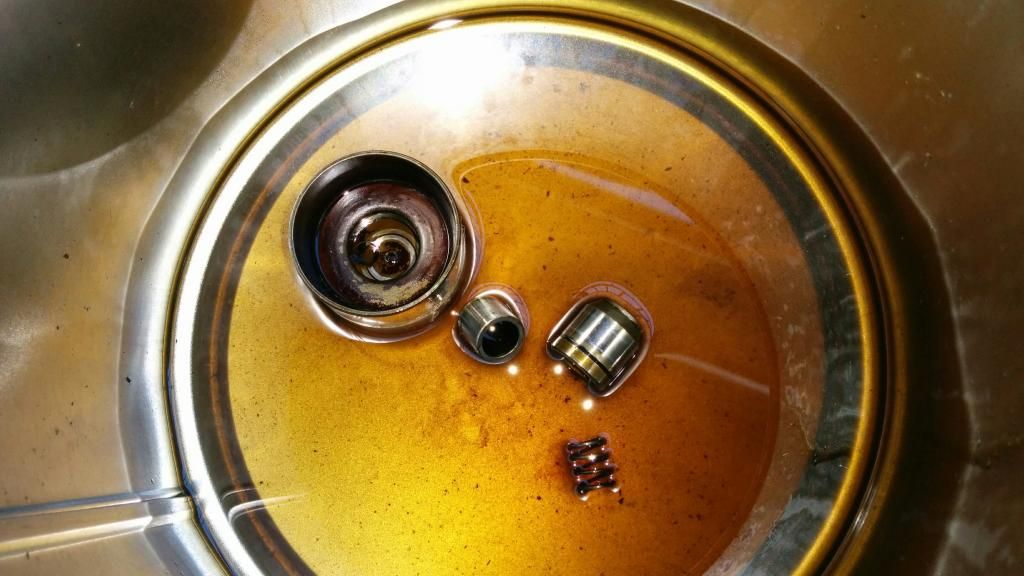
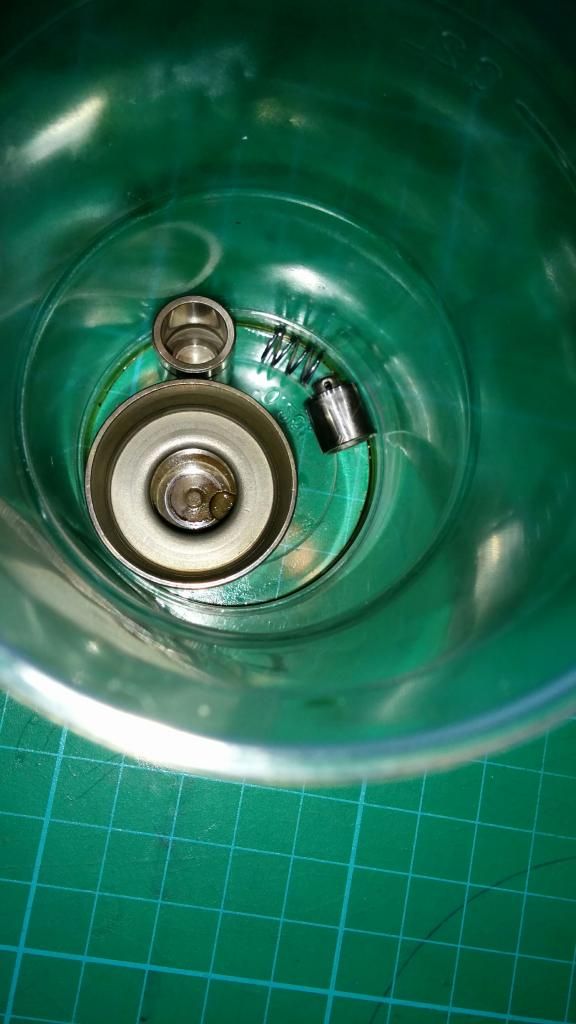
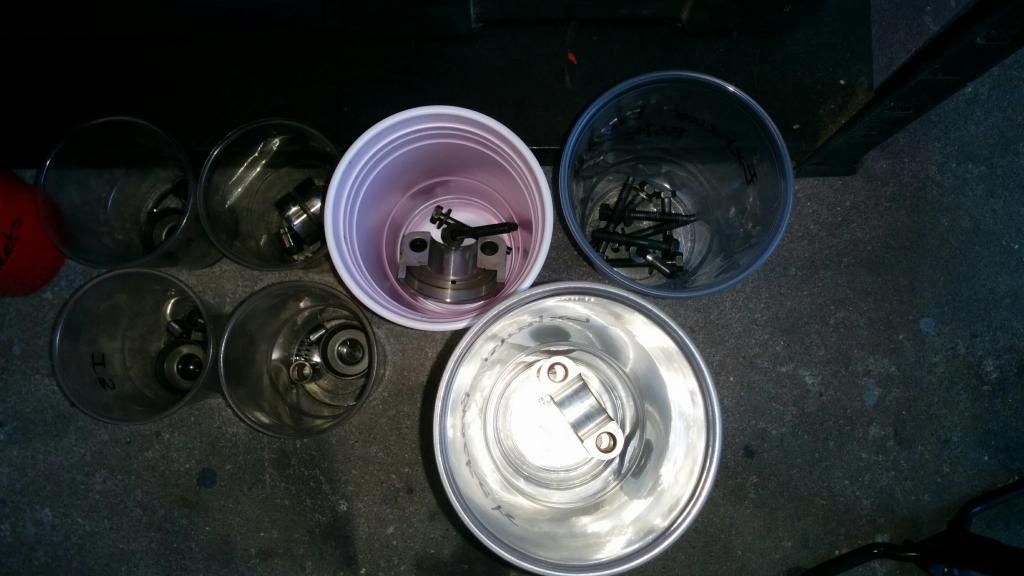
...HLA's. Well once removed all but 3 were solid. One of the three had lots of plunger movement and the other two had a little movement. Strip them down and whilst I am at it...we'll clean up all the other parts.
Step in Wynns:
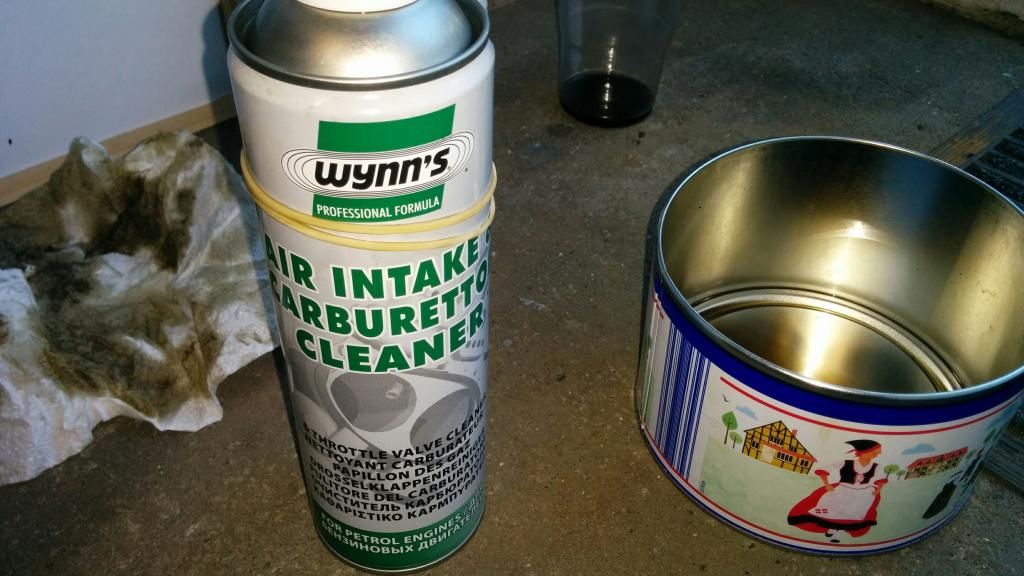
Potent stuff this...MUST use this in a well ventilated area...preferably outside. Luckily back door of my garage on a nice day day provides a good working area.
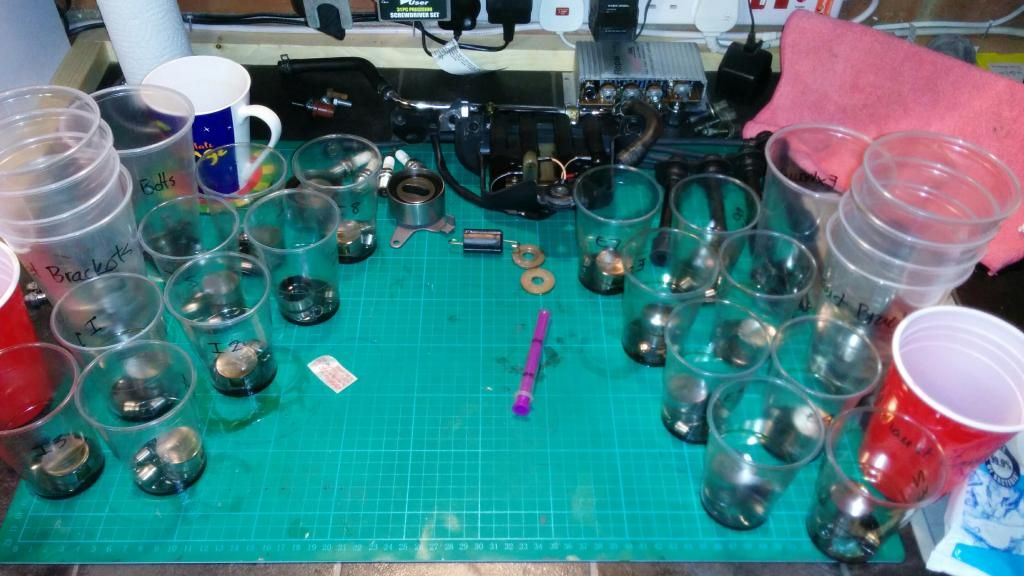
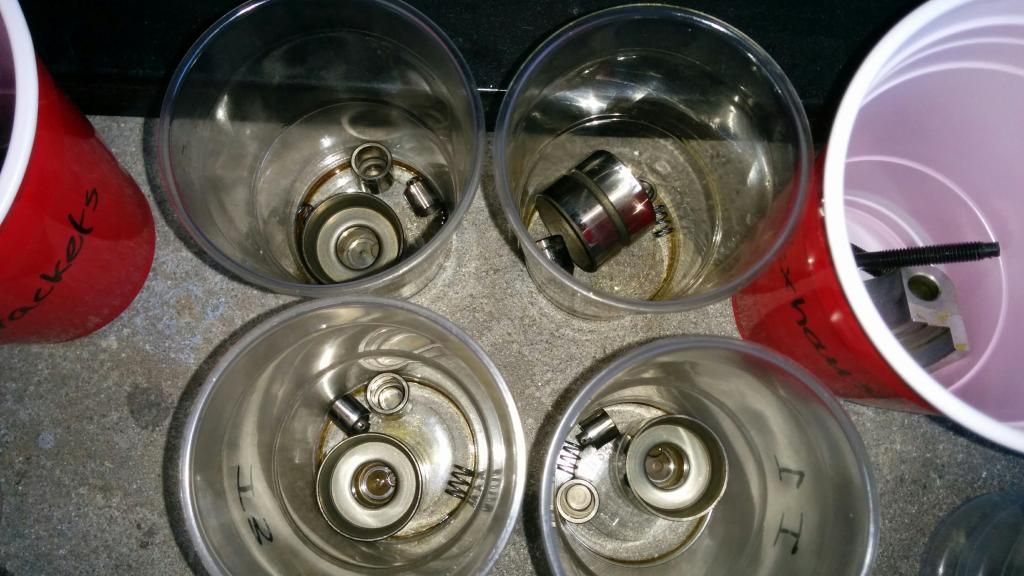
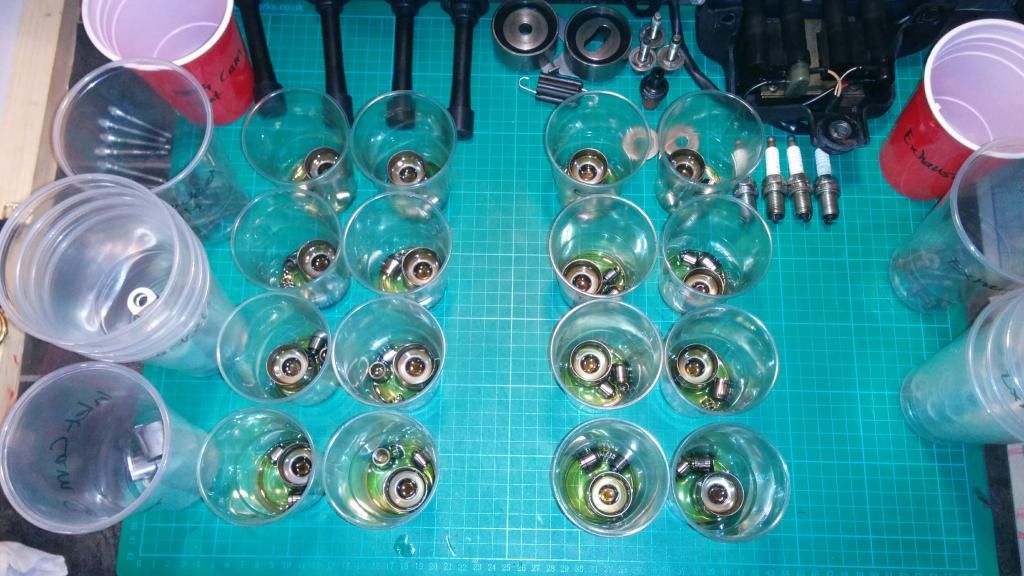
Gunky parts in containers - all marked ready for cleaning:
Nasty!
They took some getting apart....and full of black gold.
So I had a think. See that purple syringe thing on the bench above? - well anyone with small kids knows where that is from. Drugs - drugs for kids.... smile.png
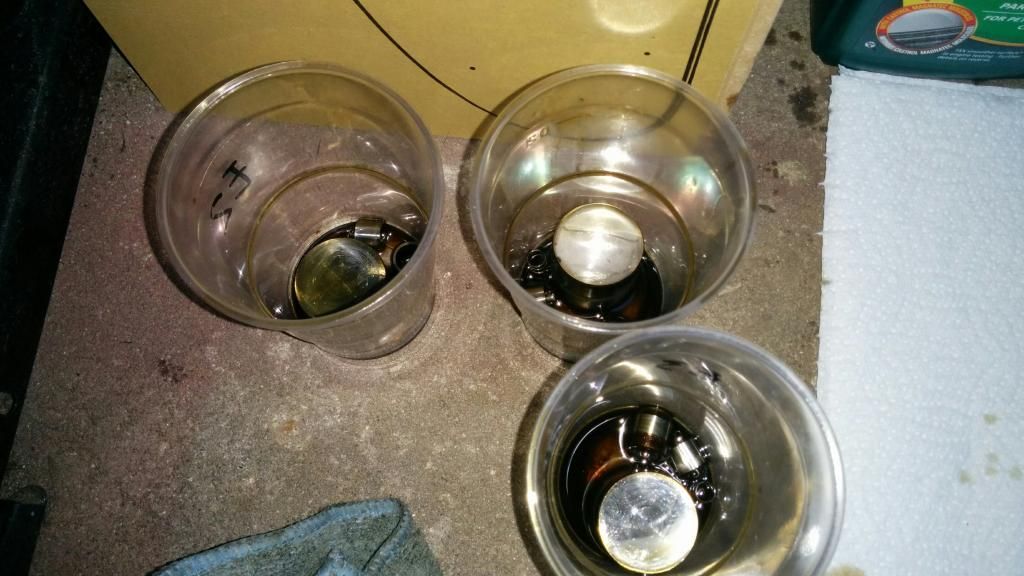
SO with some fresh Magnatec 10w40 I syringed really fast the holes that feed the HLA's in the head - this was to see if the channels are clear - if they are...oil should shoot out of other nearby hla oil feed holes. I did them all and they were all clear...oil shot out of adjacent holes and the oil in the galleries looked good too...so that means oil pressure is OK. Which means just the HLA's need doing - they probably haven't been done ever.
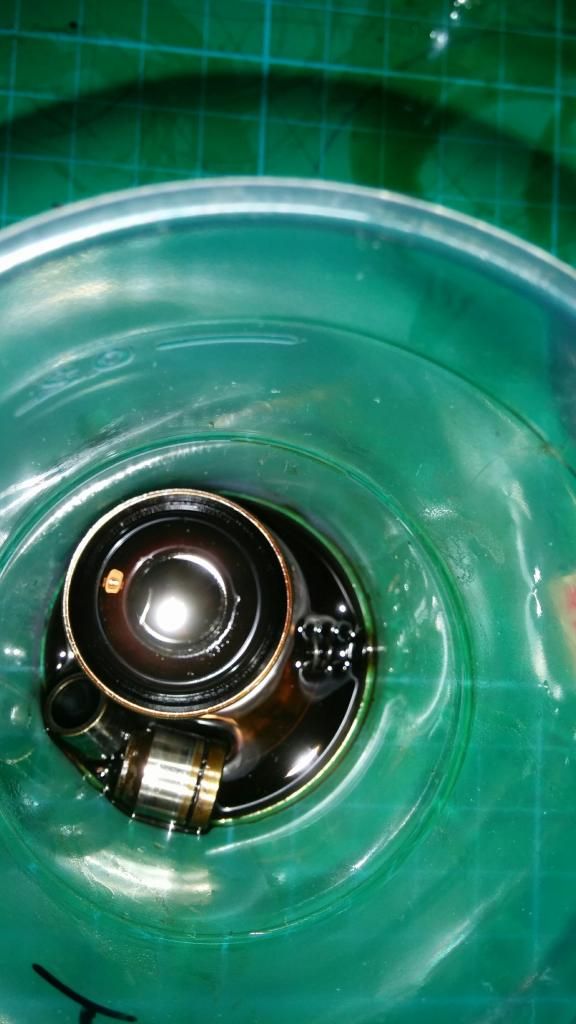
IN the tin they go...one by one.... let them soak for a while then clean then with Wynns soaked mf cloth. This was just the first one and you can see how discoloured the solution is already:
Clean and more clean of all the parts:
As new...
One done.....15 more to to go!
Other parts done....we;re getting there...but this takes a long time.... but the Wynn's stuff does work a treat smile.png
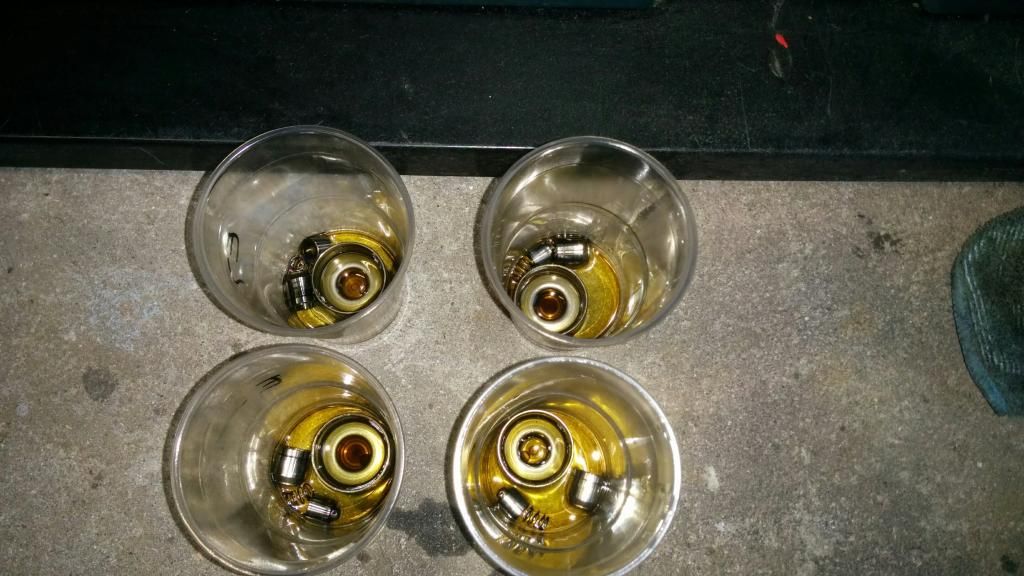
Four done.....dried off and evaporating
Yay...just three more to go...
Give the freshly done ones a couple of syringes of magnatec to bathe in
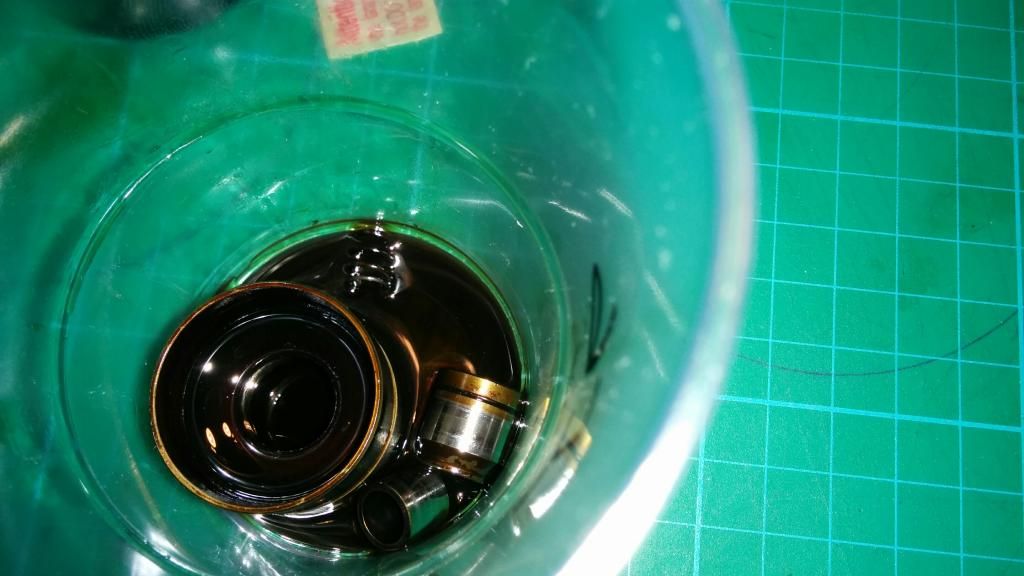
Solution is looking like...well, you know blurgh!
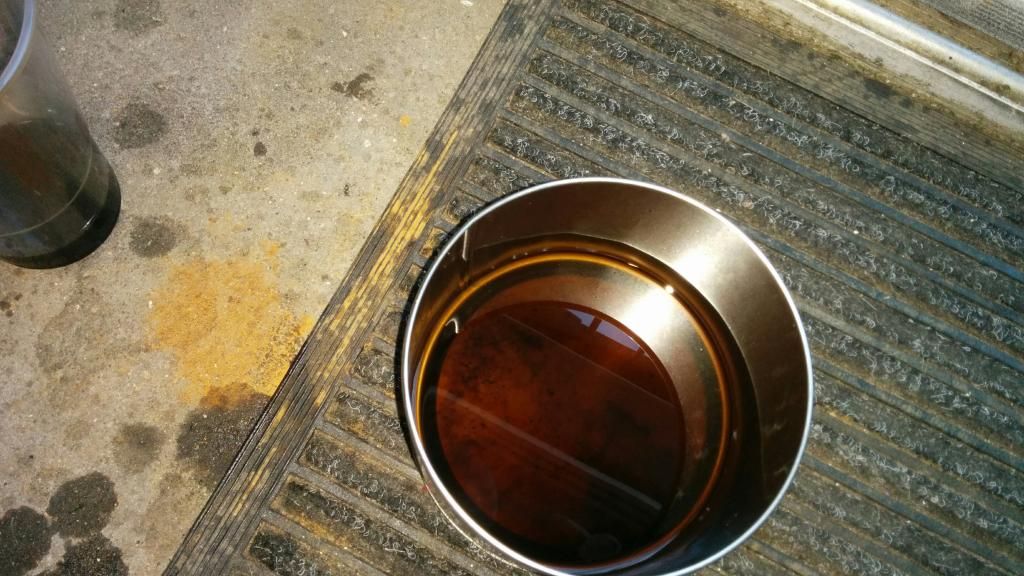
....and several hours later, all done - nice lovely clean engine parts smile.png
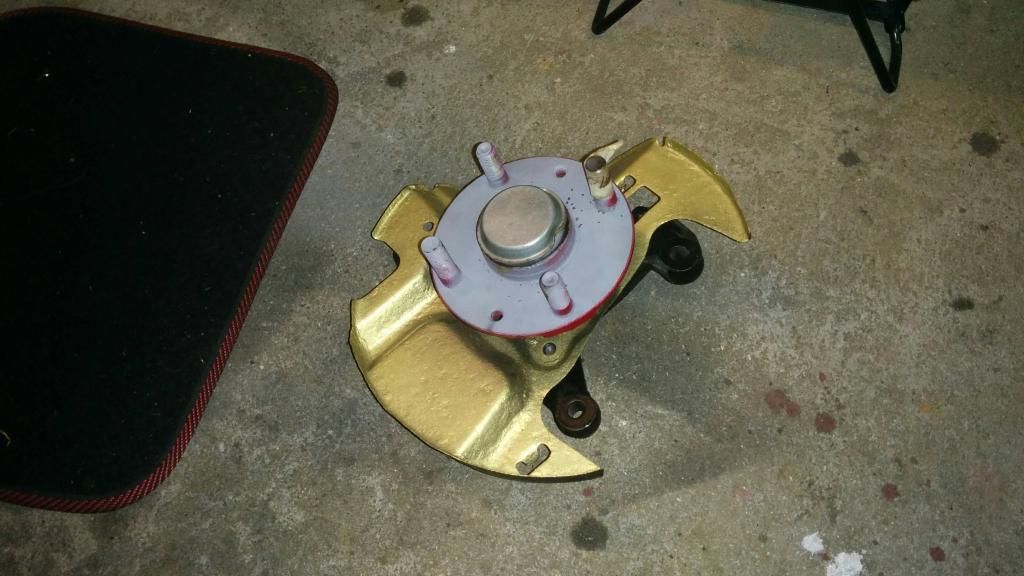
So with that done, I finished the front hubs. I already had them stripped down to their components and painted and now cleaned the bearings, rea-greased and assembled. Will torque them once fitted. The face plate of the hub that goes behind the break disk has only been stripped back and painted with zinc etch primer. Not wise to paint them as they will glues themselves to the brake discs..and besides they get a smearing of copper grease first smile.png
Hmmmm...what to do next, oh yes, lets tart some of the bolts up for the front of the engine...just because smile.png
Continued....
Step in Wynns:
Potent stuff this...MUST use this in a well ventilated area...preferably outside. Luckily back door of my garage on a nice day day provides a good working area.
Gunky parts in containers - all marked ready for cleaning:
Nasty!
They took some getting apart....and full of black gold.
So I had a think. See that purple syringe thing on the bench above? - well anyone with small kids knows where that is from. Drugs - drugs for kids.... smile.png
SO with some fresh Magnatec 10w40 I syringed really fast the holes that feed the HLA's in the head - this was to see if the channels are clear - if they are...oil should shoot out of other nearby hla oil feed holes. I did them all and they were all clear...oil shot out of adjacent holes and the oil in the galleries looked good too...so that means oil pressure is OK. Which means just the HLA's need doing - they probably haven't been done ever.
IN the tin they go...one by one.... let them soak for a while then clean then with Wynns soaked mf cloth. This was just the first one and you can see how discoloured the solution is already:
Clean and more clean of all the parts:
As new...
One done.....15 more to to go!
Other parts done....we;re getting there...but this takes a long time.... but the Wynn's stuff does work a treat smile.png
Four done.....dried off and evaporating
Yay...just three more to go...
Give the freshly done ones a couple of syringes of magnatec to bathe in
Solution is looking like...well, you know blurgh!
....and several hours later, all done - nice lovely clean engine parts smile.png
So with that done, I finished the front hubs. I already had them stripped down to their components and painted and now cleaned the bearings, rea-greased and assembled. Will torque them once fitted. The face plate of the hub that goes behind the break disk has only been stripped back and painted with zinc etch primer. Not wise to paint them as they will glues themselves to the brake discs..and besides they get a smearing of copper grease first smile.png
Hmmmm...what to do next, oh yes, lets tart some of the bolts up for the front of the engine...just because smile.png
Continued....
Regards, Hammy.
1990 Eunos 1.6 Classic Red, soon to be a different colour
1990 Eunos 1.6 Classic Red, soon to be a different colour
Re: Car-19 and the road to recovery
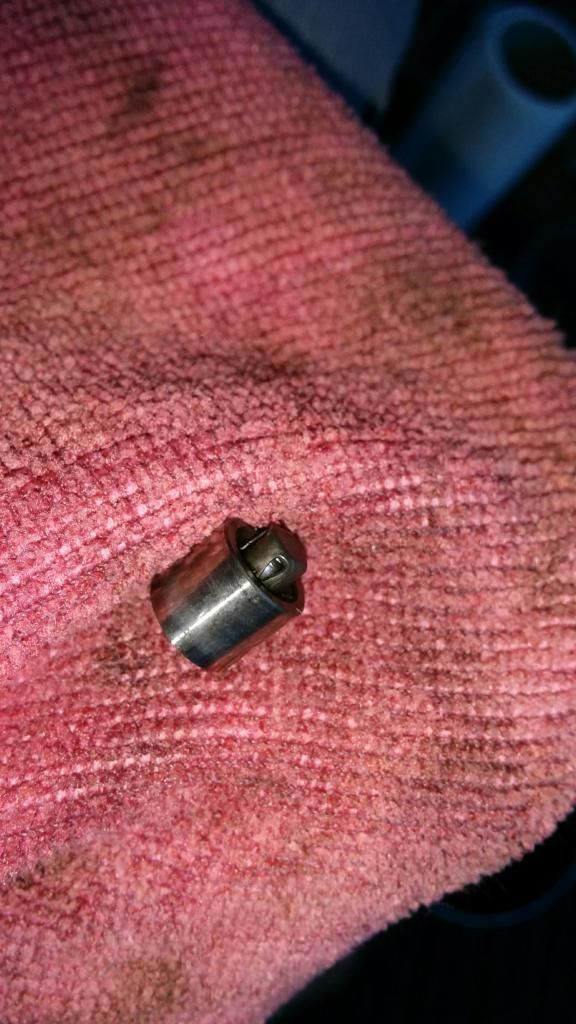
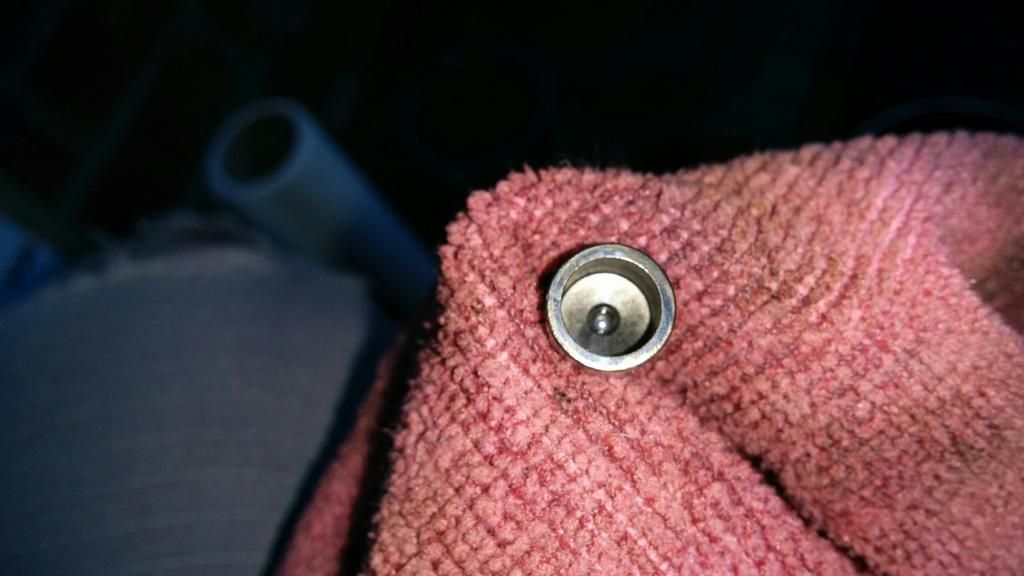
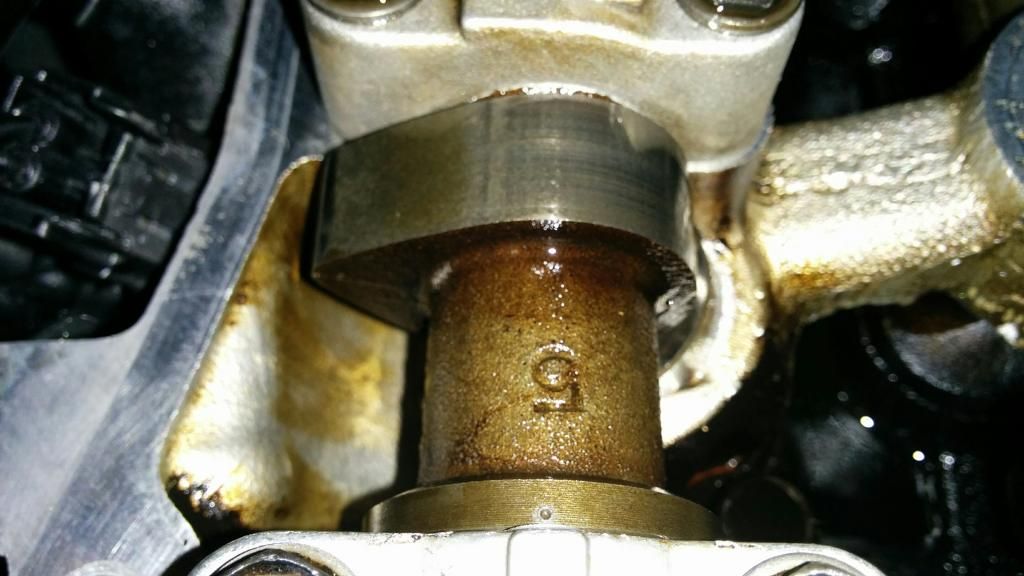
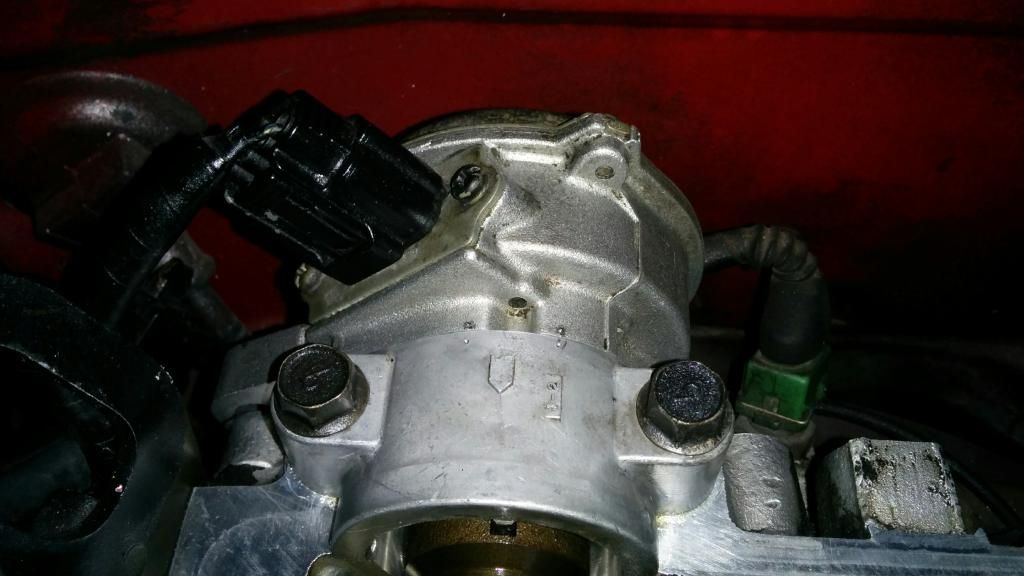
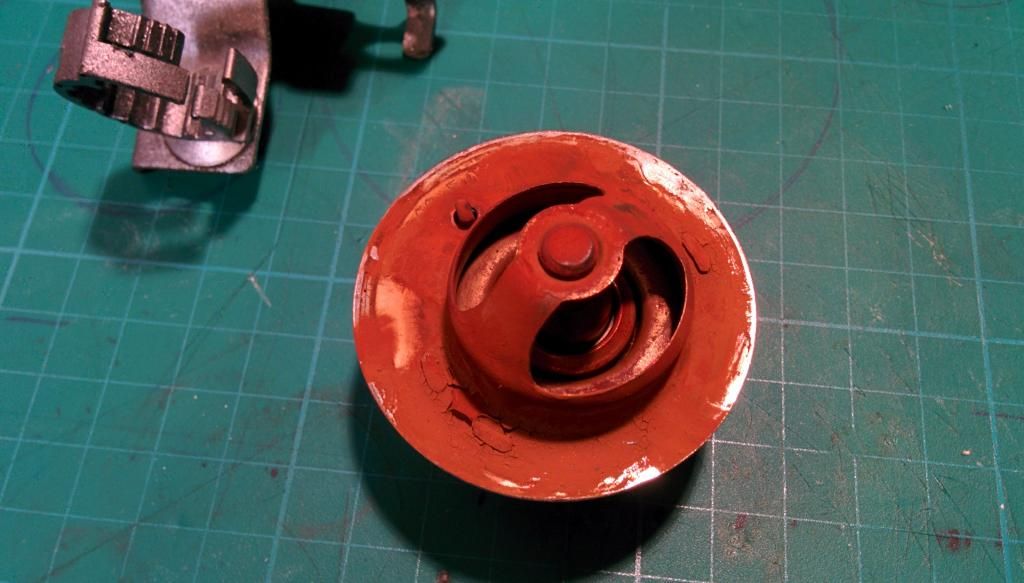
WHilst the HLA's were bathing... it was time to tackle the manky CAS...
Well past it's best...
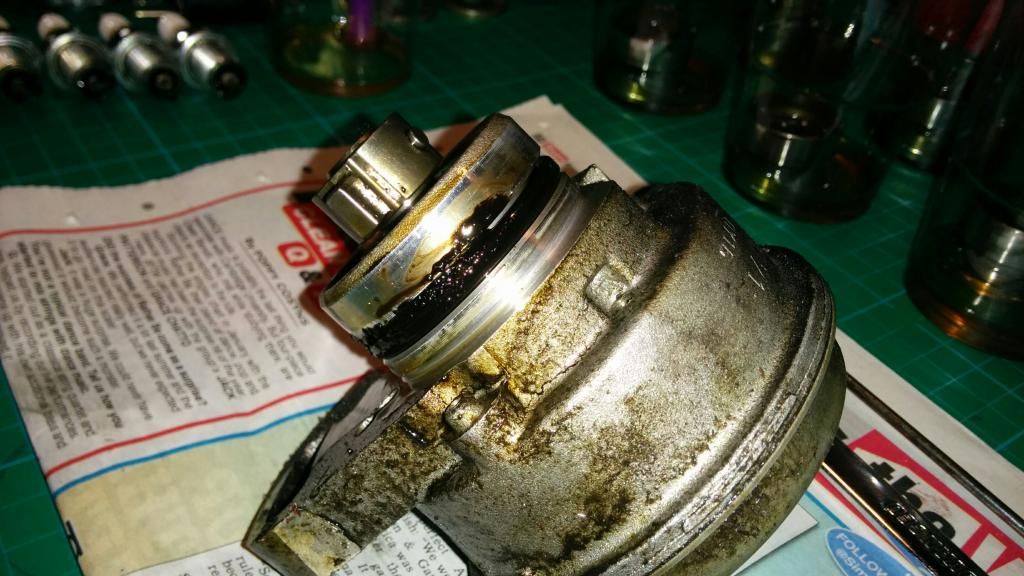
Hmm...explains a lot!
All cleaned up....
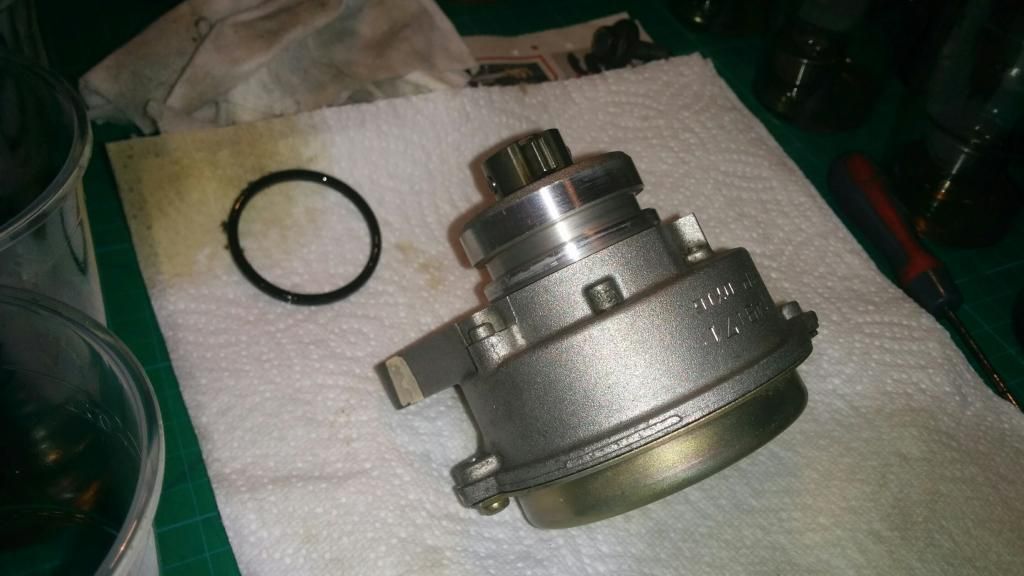
...and fresh o'ring
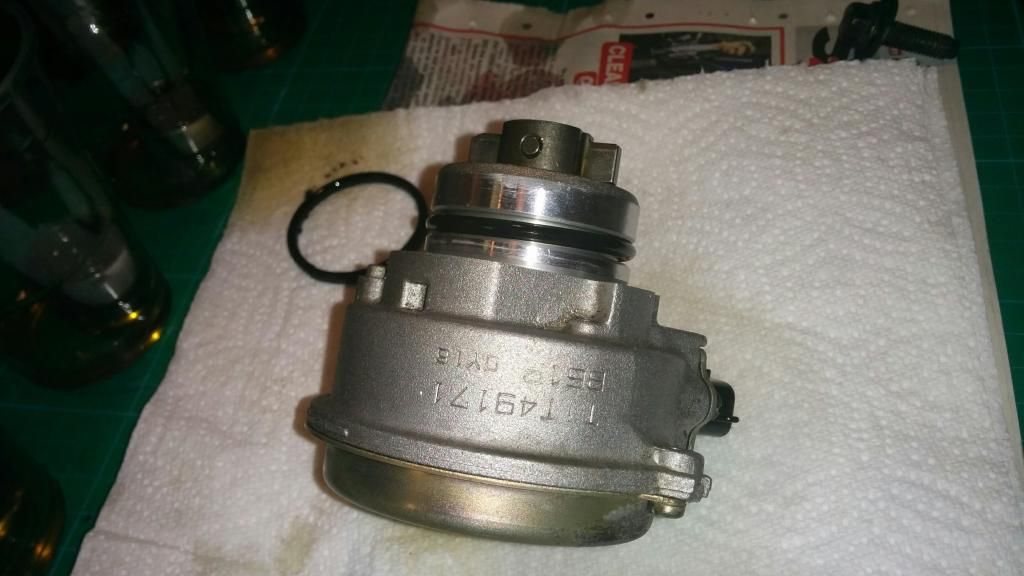
Continued...
Well past it's best...
Hmm...explains a lot!
All cleaned up....
...and fresh o'ring
Continued...
Regards, Hammy.
1990 Eunos 1.6 Classic Red, soon to be a different colour
1990 Eunos 1.6 Classic Red, soon to be a different colour
Re: Car-19 and the road to recovery
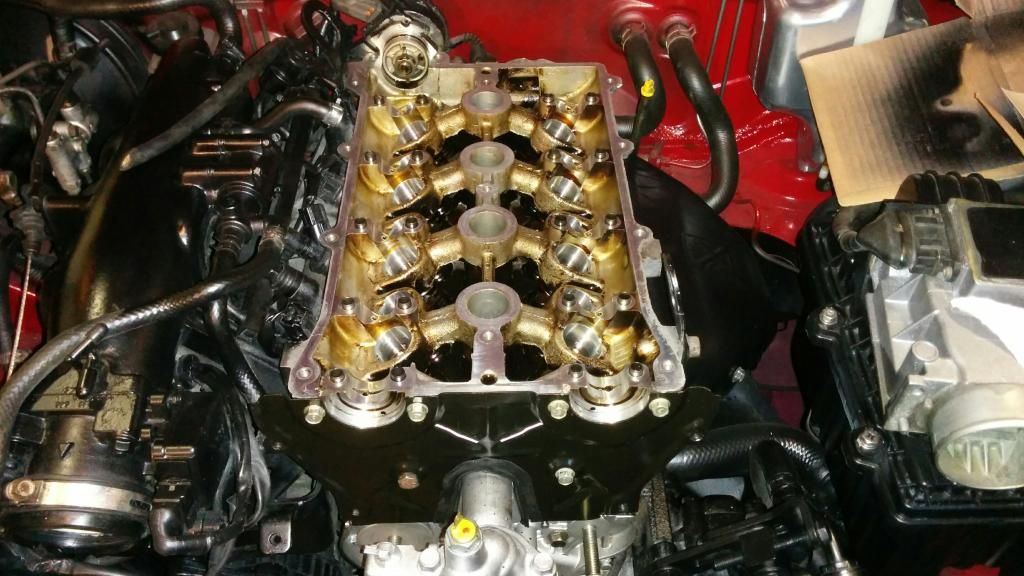
So now it's time to put it all back together again.
After giving my fingers a bench press workout by priming each one with oil, I popped them back in place with the hole pointing at the hole in the oil gallery. I then fitted the cams and torqued them down.
I then fitted new cam seals
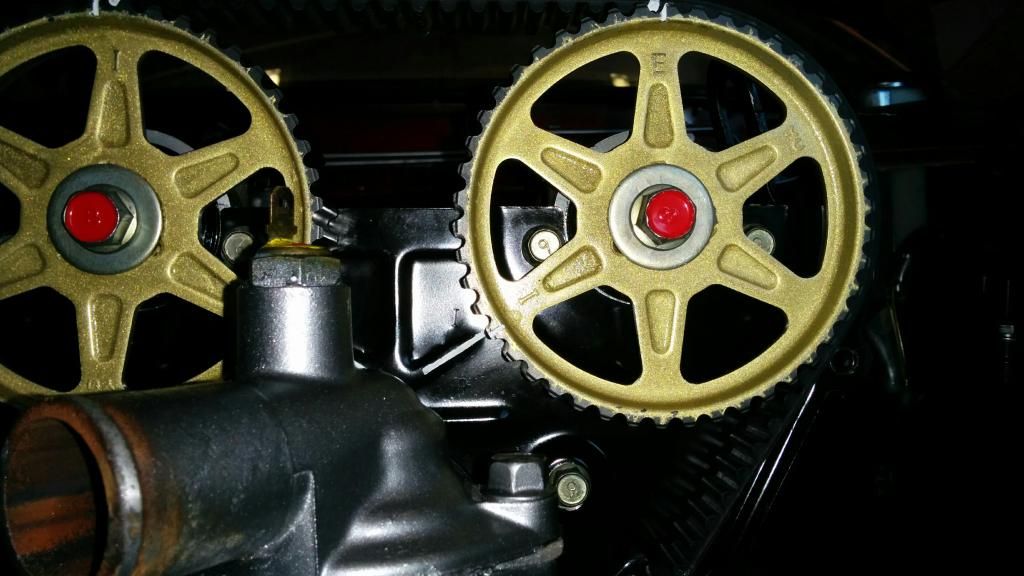
Pulleys on but not torqued up yet
Right, now this is where you need three hands..... The inlet cam is the worst as it pops round two teeth due to position of the cam lobes...and with freshly refurbed hlas with nice easy movement...it's even harder to keep the gears pointing at timing marks. However, with inlet in the correct position and forearm resting on spanner to keep exhaust in position, I popped the cam locking tool in place.
I got this locking tool from MX5 parts.... and I have to say it's crap. It DOES NOT keep the gears in the correct place at all. So, once in place I had to put a needle file in place to keep it spot on. This worked...but heed the warning, the cam locking tool is not accurate. It does lock them as I had them locked...but not on it's own.
Timing marks spot on :)
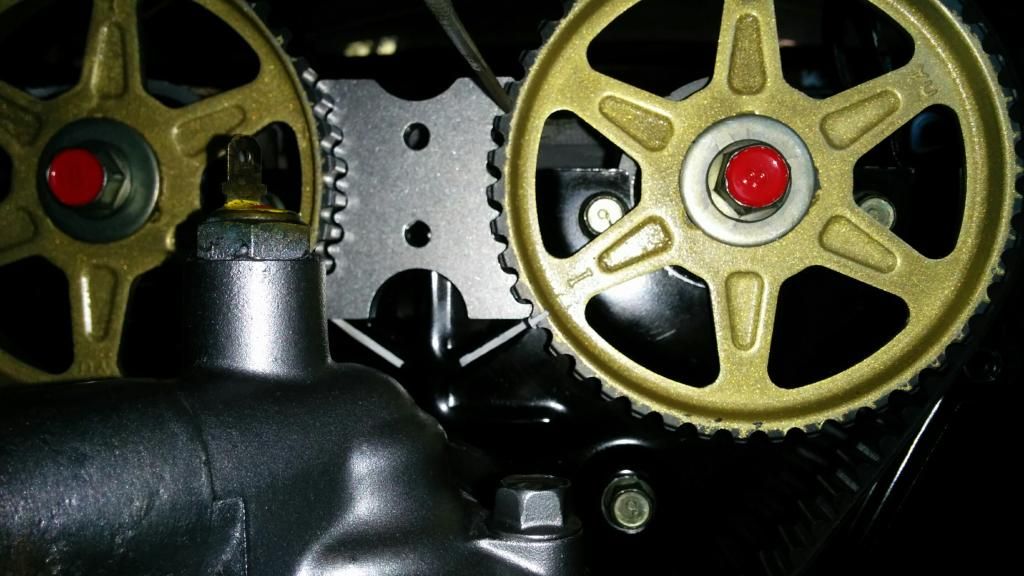
At this point I torqued the gears up to 70nm.
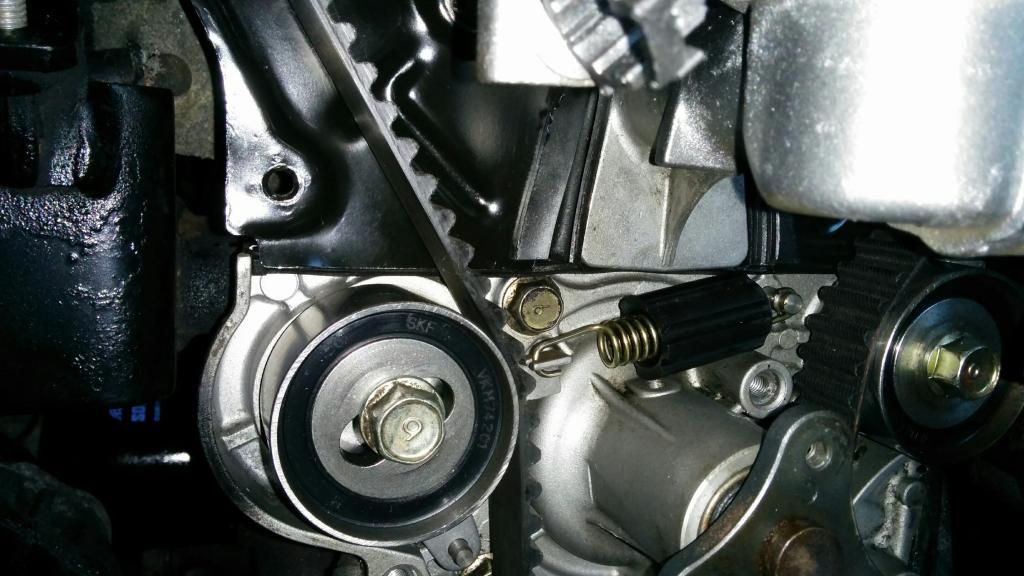
I then loosened the tensioner and let it tension itself in place, checked there was a tiny bit deflection in the belt, then tightened this up to 50nm.
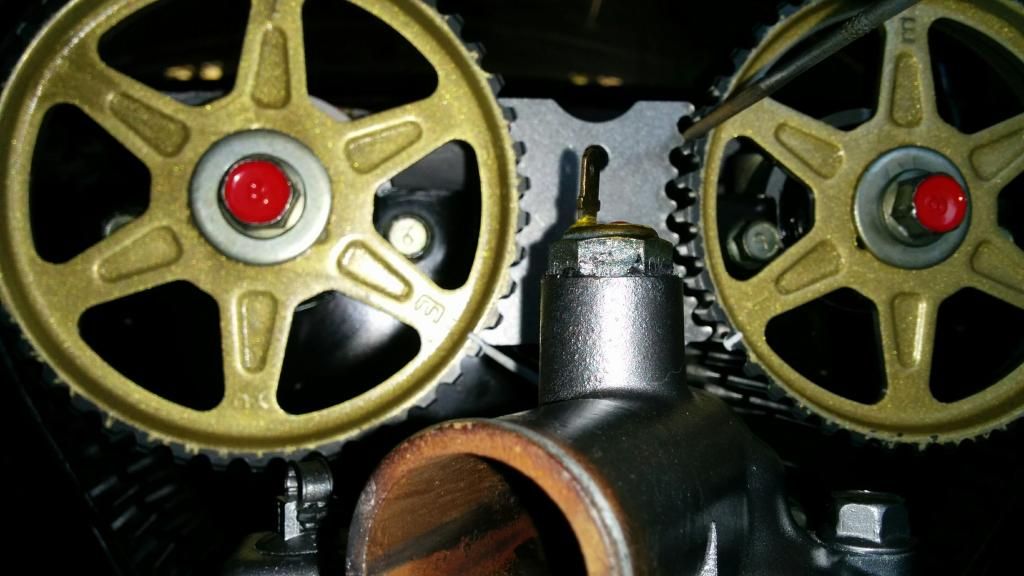
Took out the cam locking tool...now the gears should stay bang in place.... and they did:
Now it was time to check the timing belt....so one full rotation of the crank....
...and the cam gears should be pointing exactly 180 degrees opposite...spot on
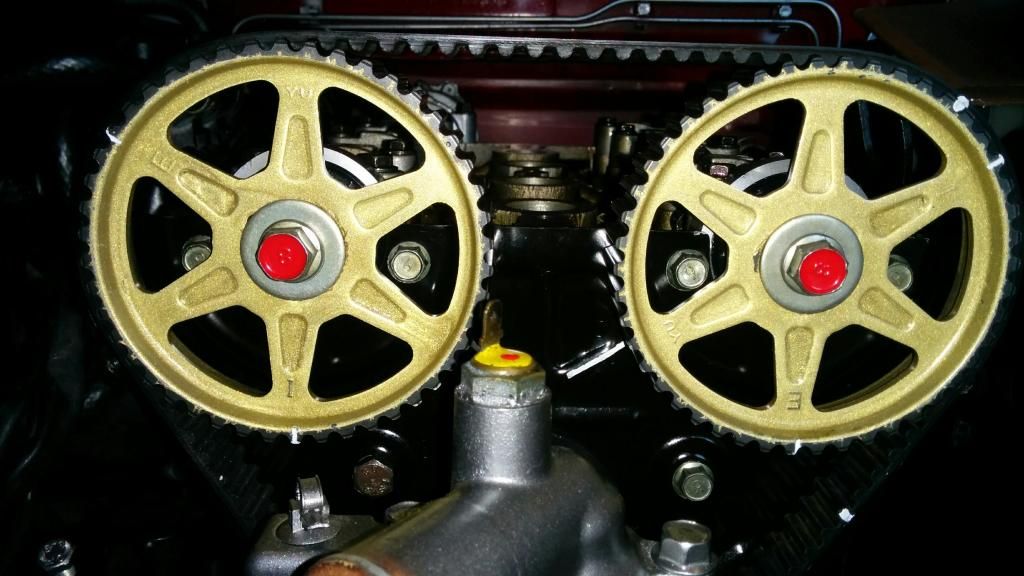
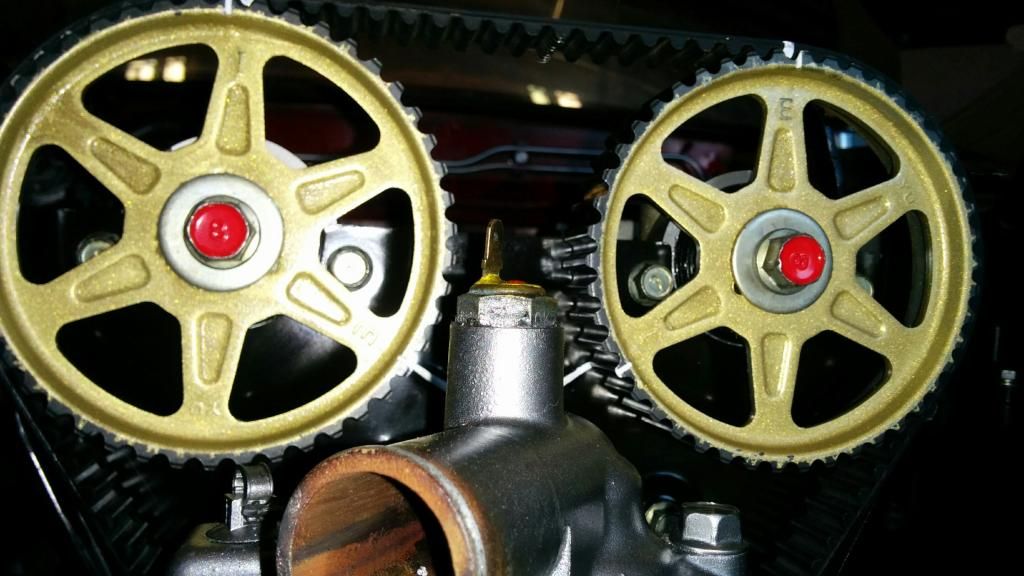
Another full turn...
...and the gears should line up perfect...wooohooo :)
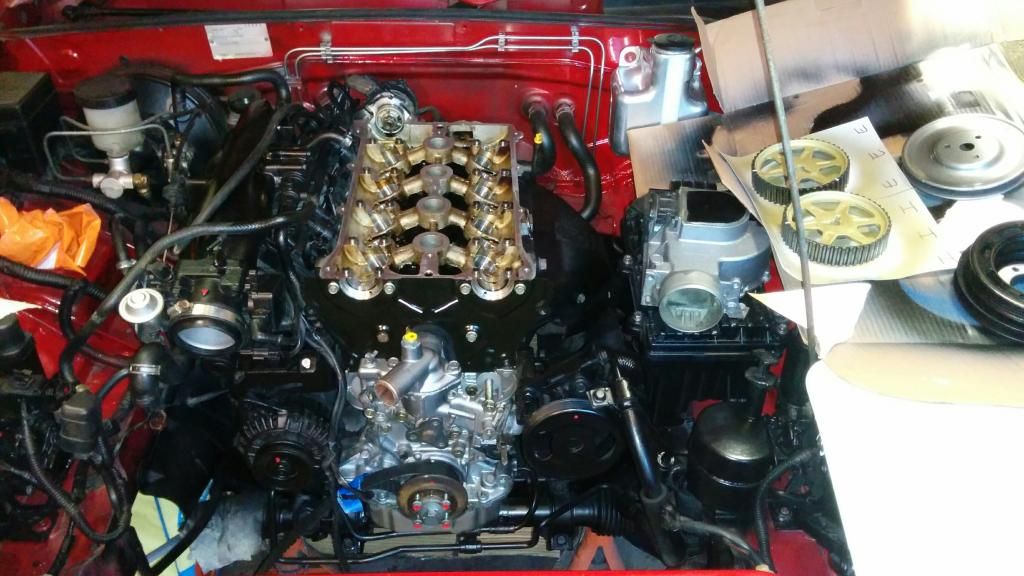
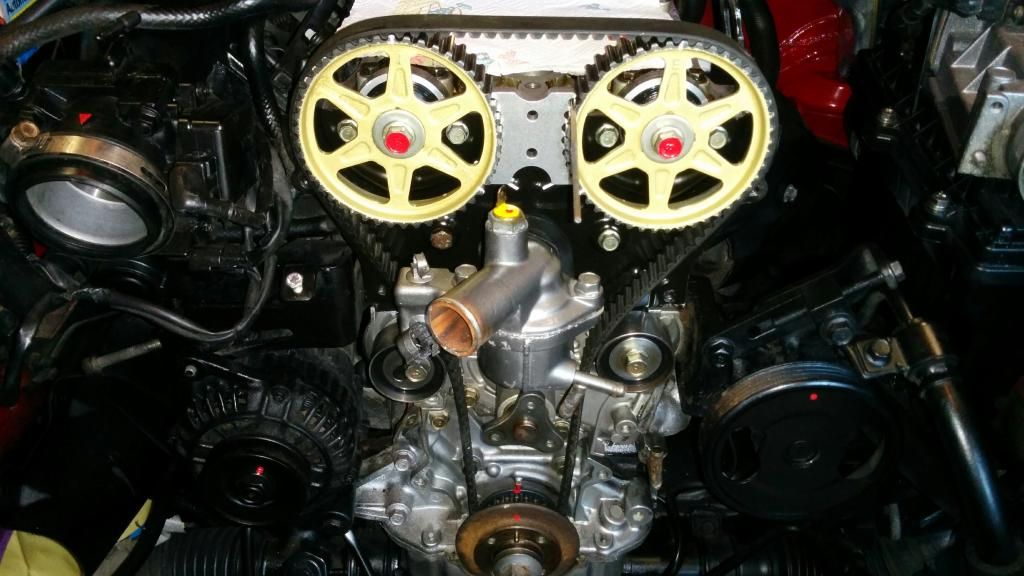
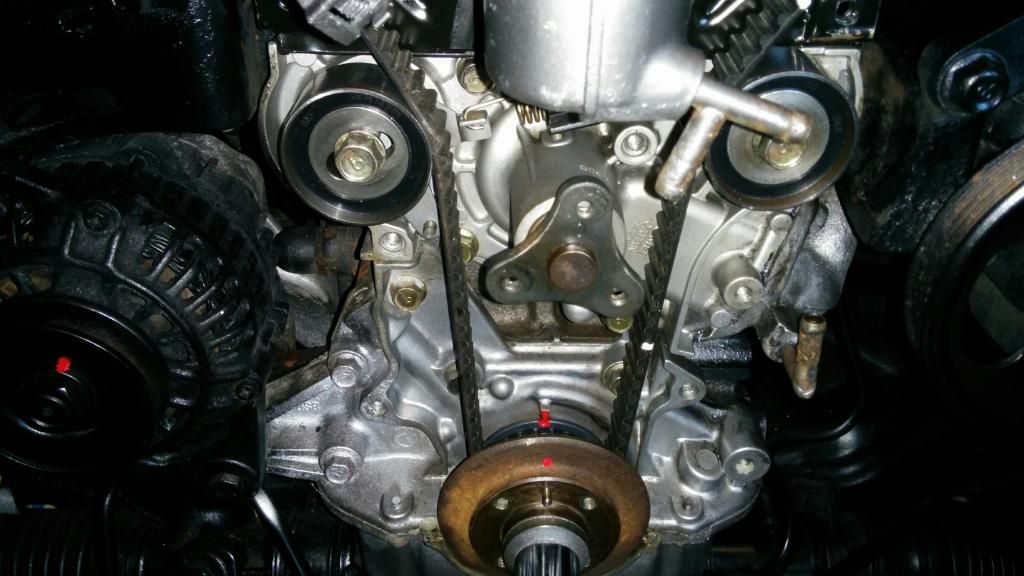
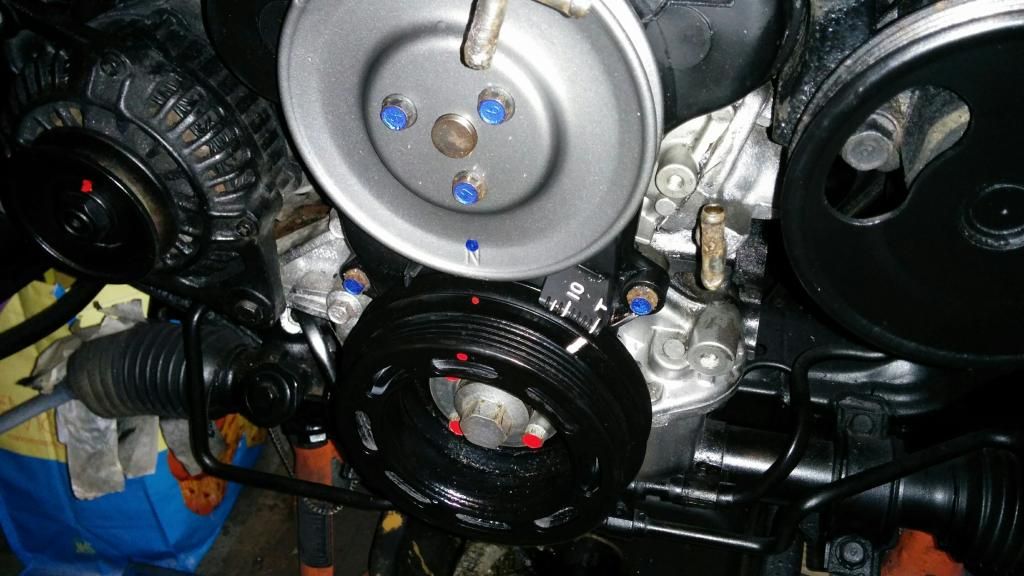
Now put the covers back on...all tarted up and the water pulley
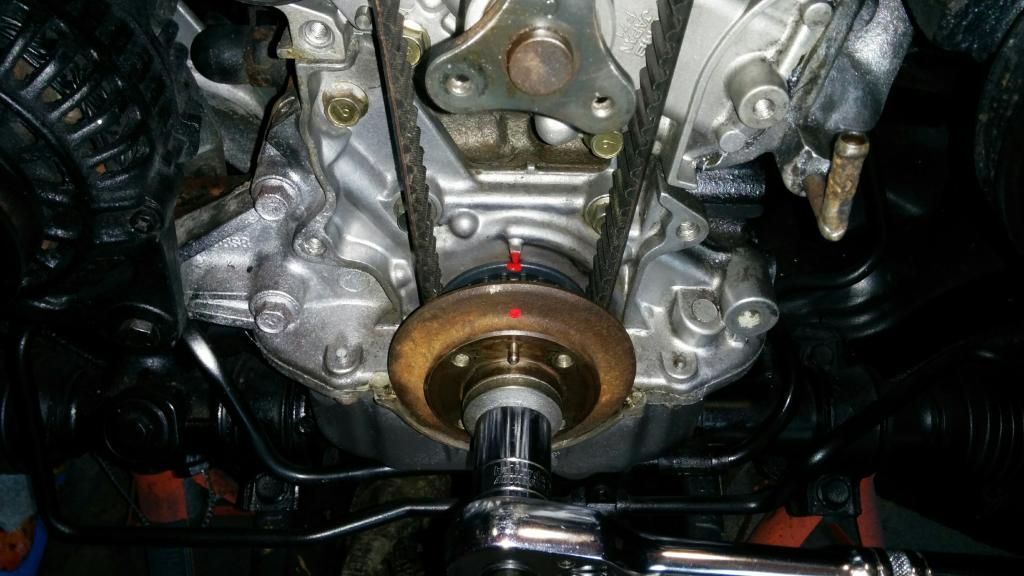
Now the crank pulley..
...and timing parks line up perfectly. I marked them all up whilst they were off...and the 14 degree mark marked ready for the 14 degree mod.
Now, before I took anything apart, I had it all at TDC and centre popped the cams and the cas.... so let's check they are perfectly back in place:

Champion.
After giving my fingers a bench press workout by priming each one with oil, I popped them back in place with the hole pointing at the hole in the oil gallery. I then fitted the cams and torqued them down.
I then fitted new cam seals
Pulleys on but not torqued up yet
Right, now this is where you need three hands..... The inlet cam is the worst as it pops round two teeth due to position of the cam lobes...and with freshly refurbed hlas with nice easy movement...it's even harder to keep the gears pointing at timing marks. However, with inlet in the correct position and forearm resting on spanner to keep exhaust in position, I popped the cam locking tool in place.
I got this locking tool from MX5 parts.... and I have to say it's crap. It DOES NOT keep the gears in the correct place at all. So, once in place I had to put a needle file in place to keep it spot on. This worked...but heed the warning, the cam locking tool is not accurate. It does lock them as I had them locked...but not on it's own.
Timing marks spot on :)
At this point I torqued the gears up to 70nm.
I then loosened the tensioner and let it tension itself in place, checked there was a tiny bit deflection in the belt, then tightened this up to 50nm.
Took out the cam locking tool...now the gears should stay bang in place.... and they did:
Now it was time to check the timing belt....so one full rotation of the crank....
...and the cam gears should be pointing exactly 180 degrees opposite...spot on
Another full turn...
...and the gears should line up perfect...wooohooo :)
Now put the covers back on...all tarted up and the water pulley
Now the crank pulley..
...and timing parks line up perfectly. I marked them all up whilst they were off...and the 14 degree mark marked ready for the 14 degree mod.
Now, before I took anything apart, I had it all at TDC and centre popped the cams and the cas.... so let's check they are perfectly back in place:
Champion.
Last edited by Hamish on Tue Jun 24, 2014 8:57 pm, edited 1 time in total.
Regards, Hammy.
1990 Eunos 1.6 Classic Red, soon to be a different colour
1990 Eunos 1.6 Classic Red, soon to be a different colour
Re: Car-19 and the road to recovery
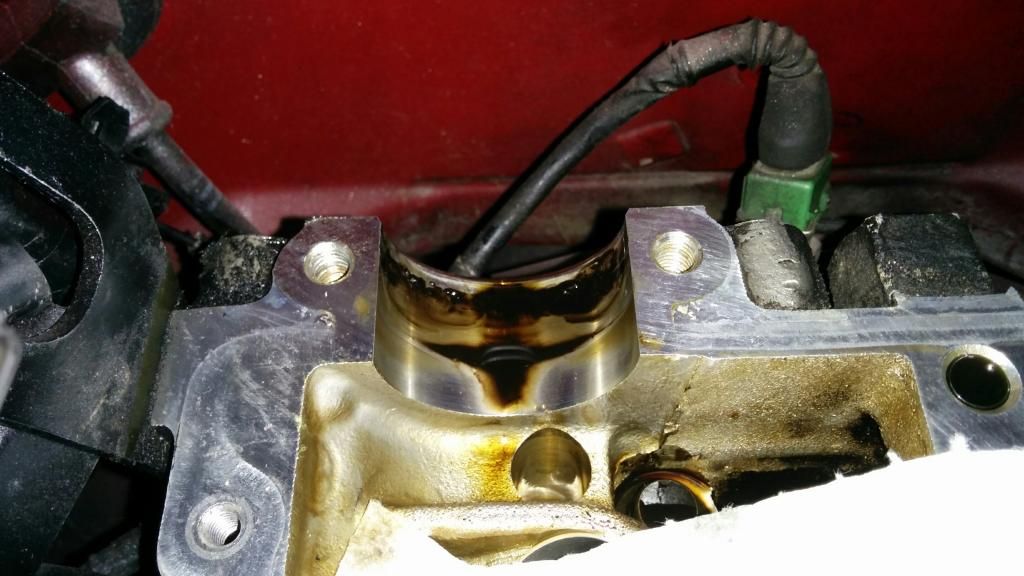
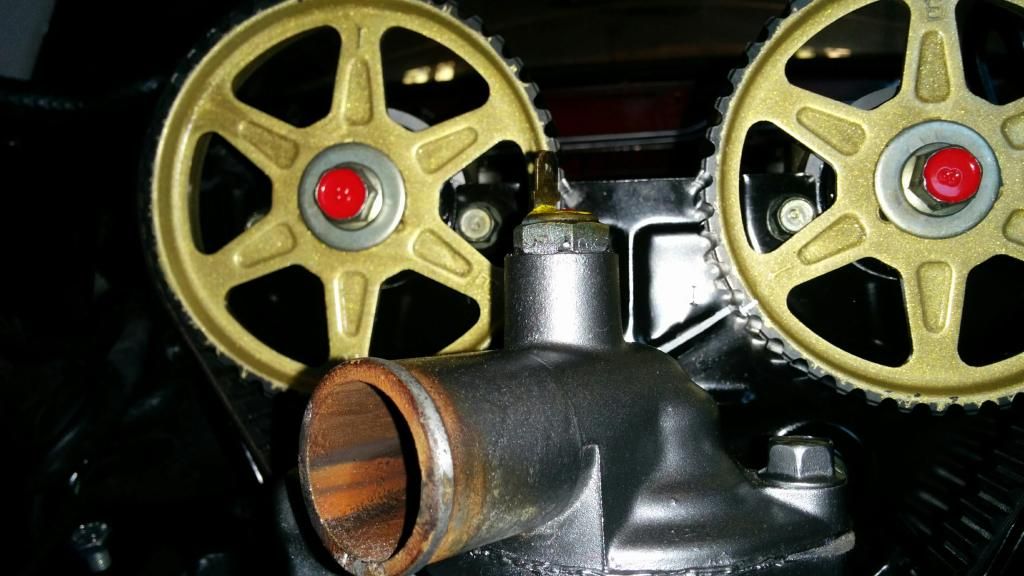
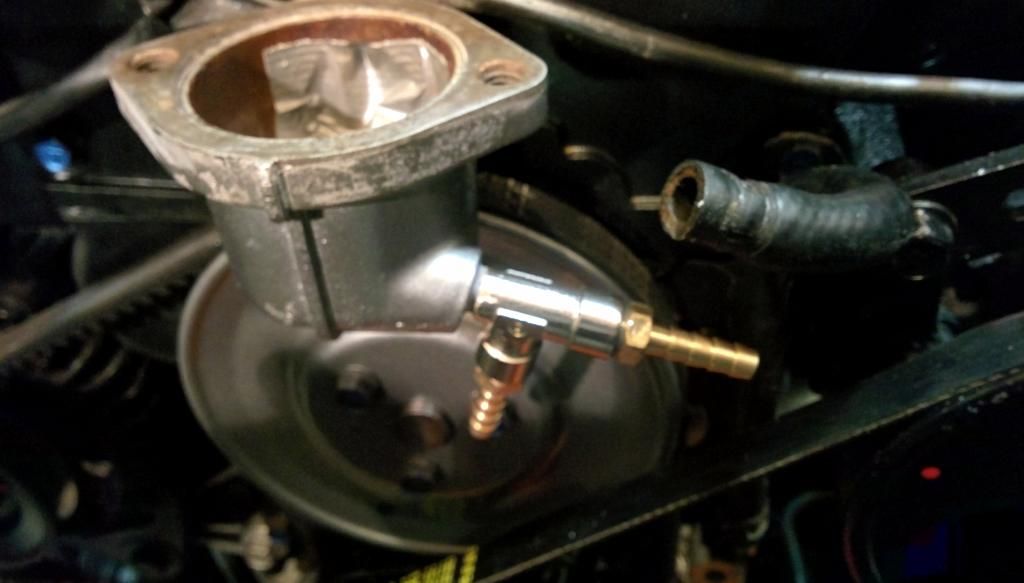
I got the engine put back together today and had it running on first turn tonight :) Runs so sweet now. Got it up to temp and then the useless T piece on the thermostat housing, which is a common area for failure, sprung a leak.... I am not going to jb weld it, instead, will tap the hole on the thermo housing to 1/8th bsp and fit a brass f-f-f t piece and thread into housng with a 1/8th m-m joiner and two male airline pieces....then that should fettle that....and certainly better than buying a new lower housing at £70+
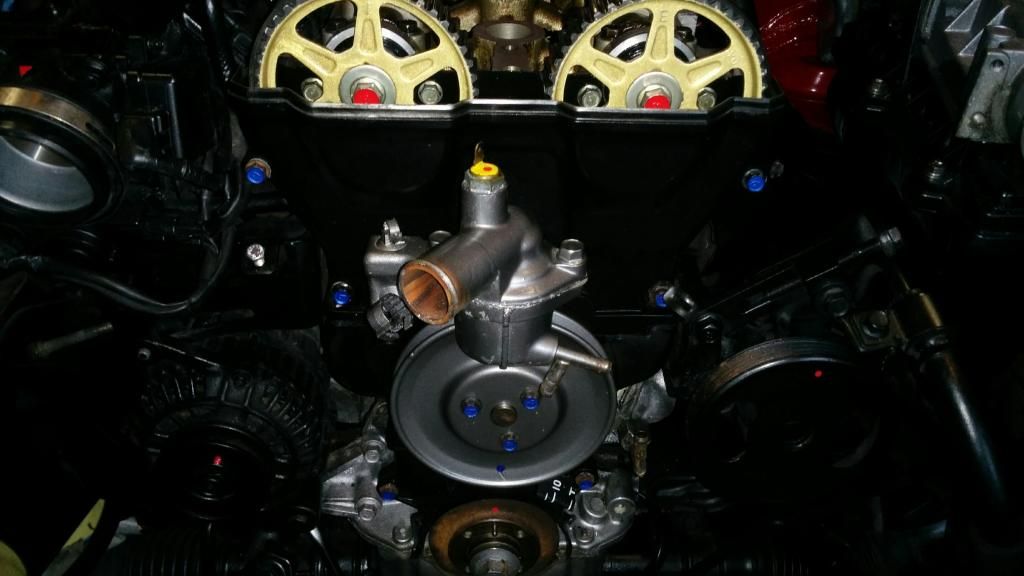
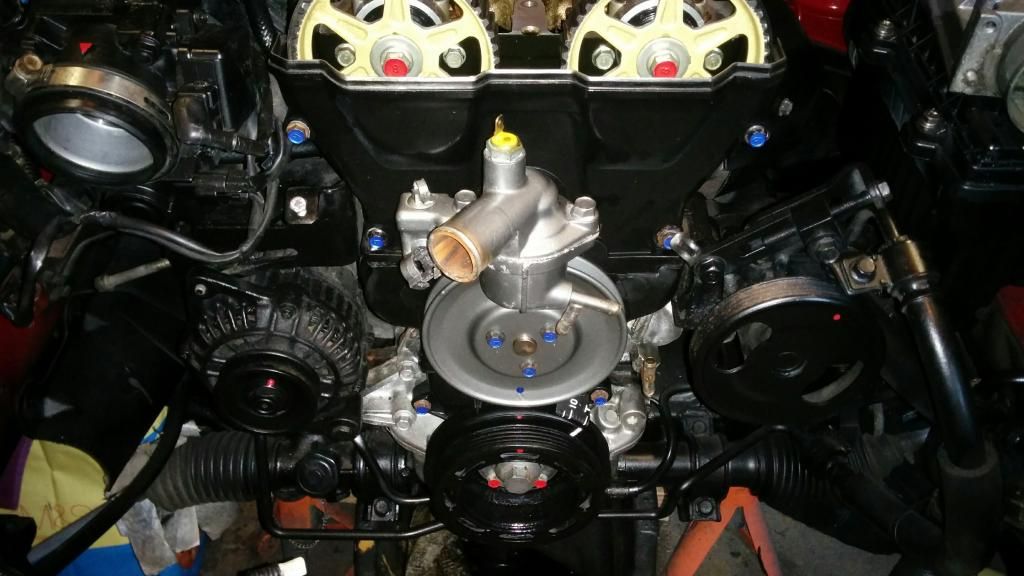
So back together....
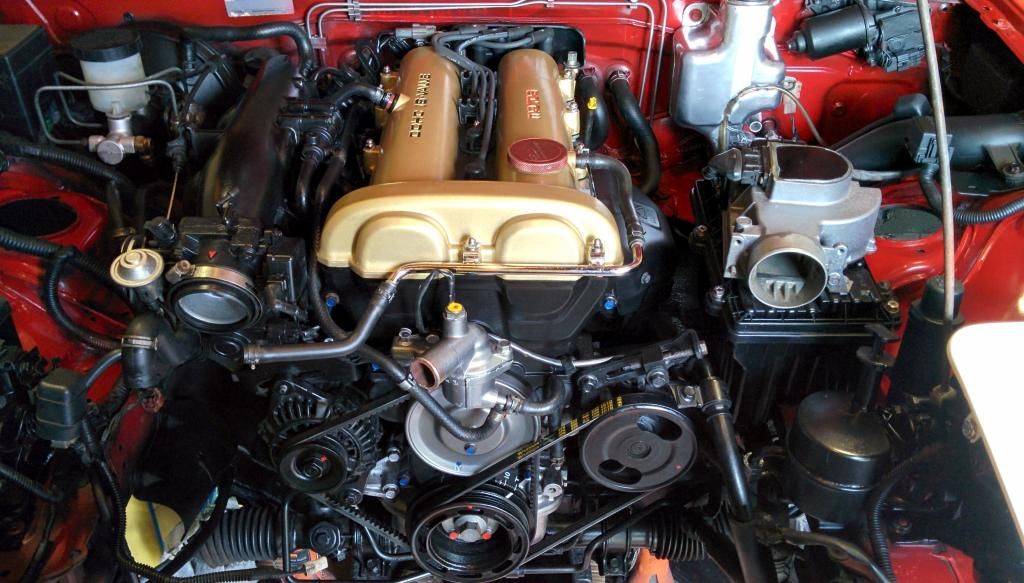
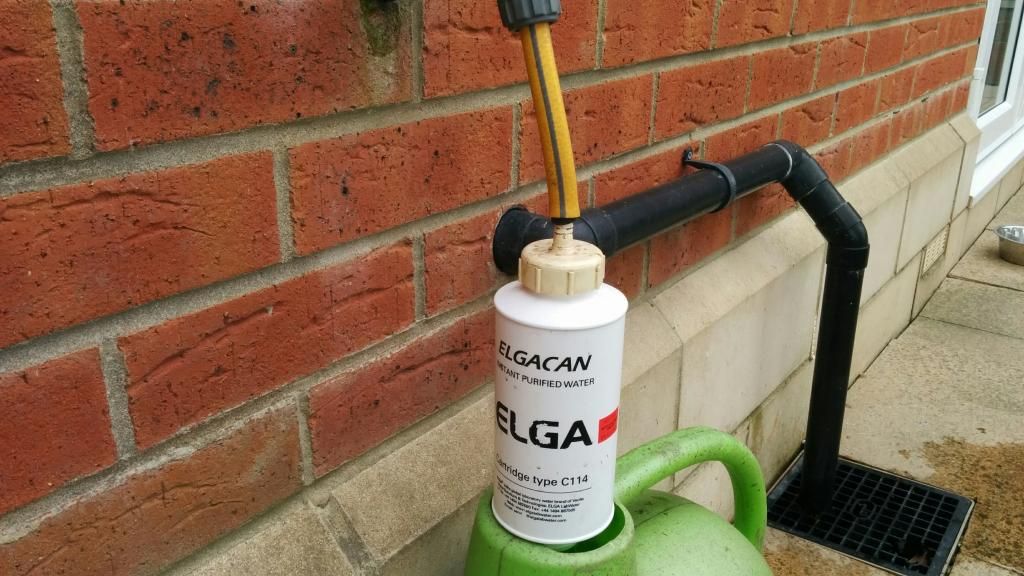
Then I made myself some de-ionised water for the cooling system. This is super de-mineralised water which is the best thing for cooling systems. I'll flush it through up to temp about 4 times then mix it 50/50 with antifreeze. Deminerlised water is expensive to buy.... but I got this filter from the lab at work... can make myself about a 1000 litres of de-ionised water....perfect :)
Then after refurbing my radiator...put it all back together ready for starting :)
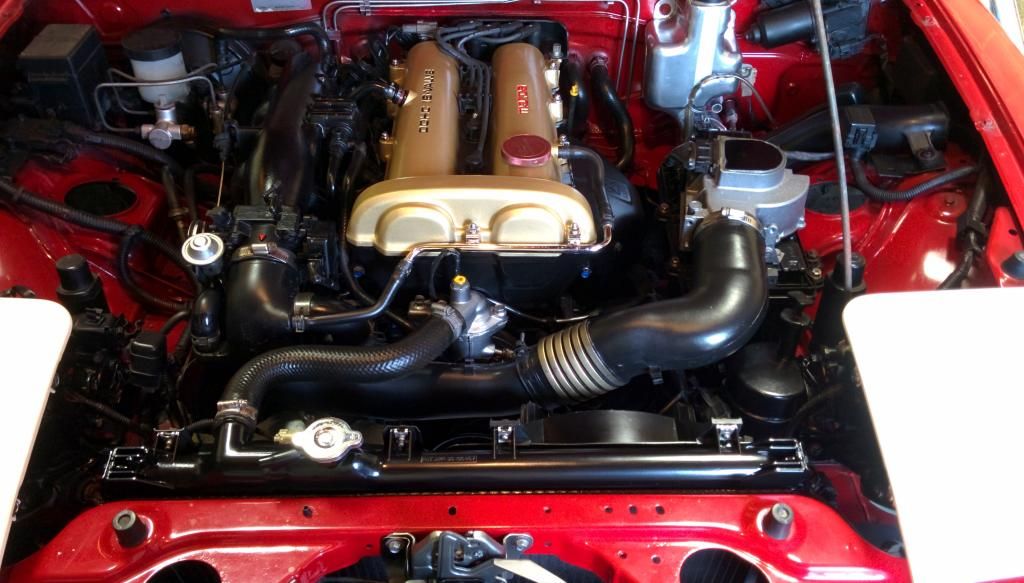
Job done..... now just got to tackle that t piece on the thermostat.
So back together....
Then I made myself some de-ionised water for the cooling system. This is super de-mineralised water which is the best thing for cooling systems. I'll flush it through up to temp about 4 times then mix it 50/50 with antifreeze. Deminerlised water is expensive to buy.... but I got this filter from the lab at work... can make myself about a 1000 litres of de-ionised water....perfect :)
Then after refurbing my radiator...put it all back together ready for starting :)
Job done..... now just got to tackle that t piece on the thermostat.
Regards, Hammy.
1990 Eunos 1.6 Classic Red, soon to be a different colour
1990 Eunos 1.6 Classic Red, soon to be a different colour
Re: Car-19 and the road to recovery
Just read this from start to finish (to date), excellent work there fella, this is what we all aspire to, but seldom reach, well done.
Re: Car-19 and the road to recovery
She's coming on a treat mate as I knew she would. Great work, keep it up
Eunos 1.6 special 1989 with a few added extras
Eunos 1991 1.6
Eunos 1990 1.6 project
Mk2 1999 1.8
Eunos 1991 1.6
Eunos 1990 1.6 project
Mk2 1999 1.8
Re: Car-19 and the road to recovery
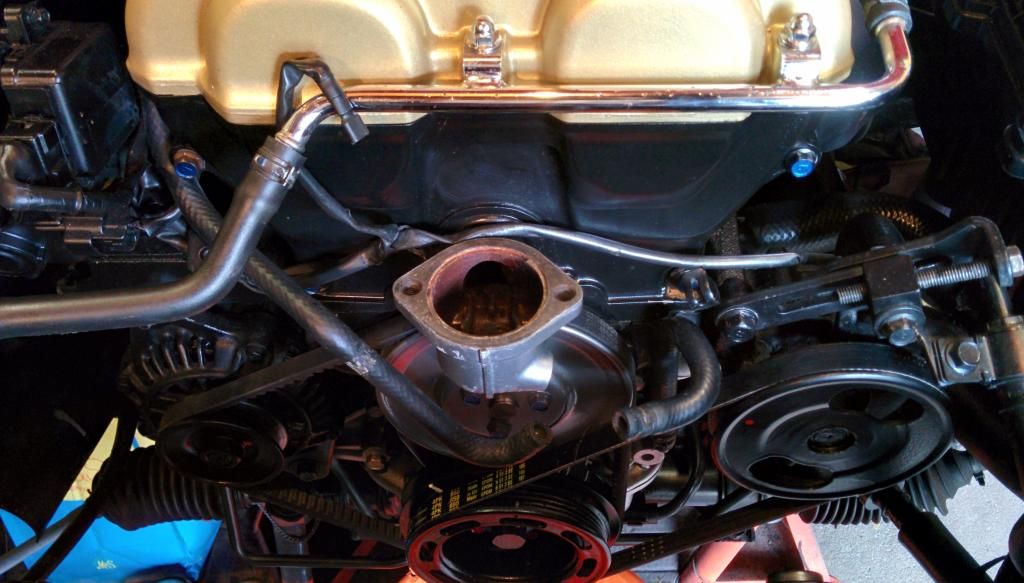
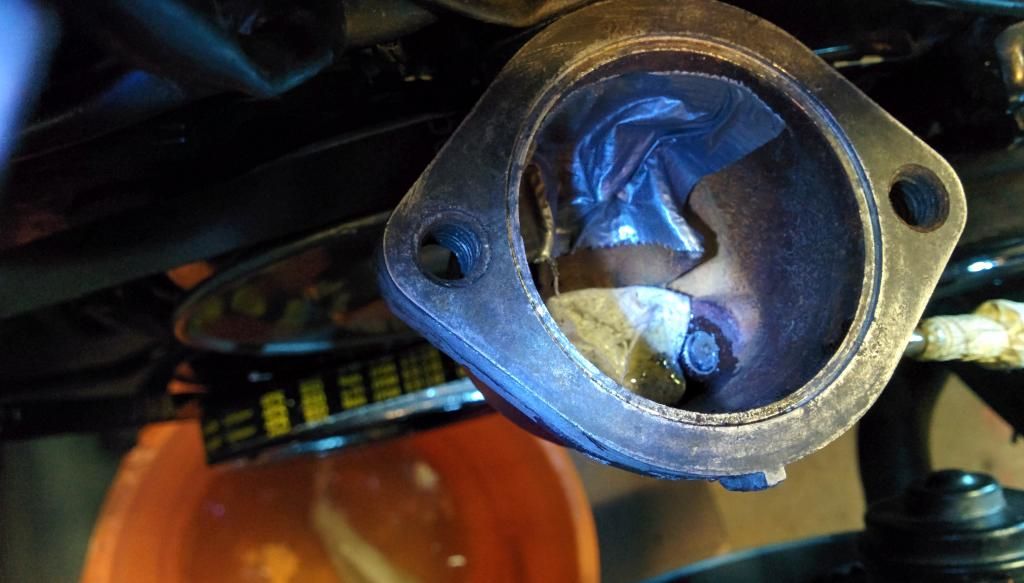
Right...the T piece on the bottom/side of the lower thermostat housing decided it would split, in the housing after I had rebuilt the engine...spewing it's guts, how nice! There are two ways to mend this... buy a new one at £70..... or DIY fix...
I am not spending £70 for a naff piece of metal.
£5 later, I am ready to diy. Now I could take the whole front of the engine apart again to get the housing off...but If I am doing that I may as well buy new..... so fix insitu.
As there is no room for any kind of tools, this was going to be a case of just fingers.
Firstly I have decided to use a 18th bsp t piece - which means reaming the hole and then tapping the hole in the housing...I will use a hand reamer... and when I say hand reamer, I literally mean...by hand - fingers and thumbs only!
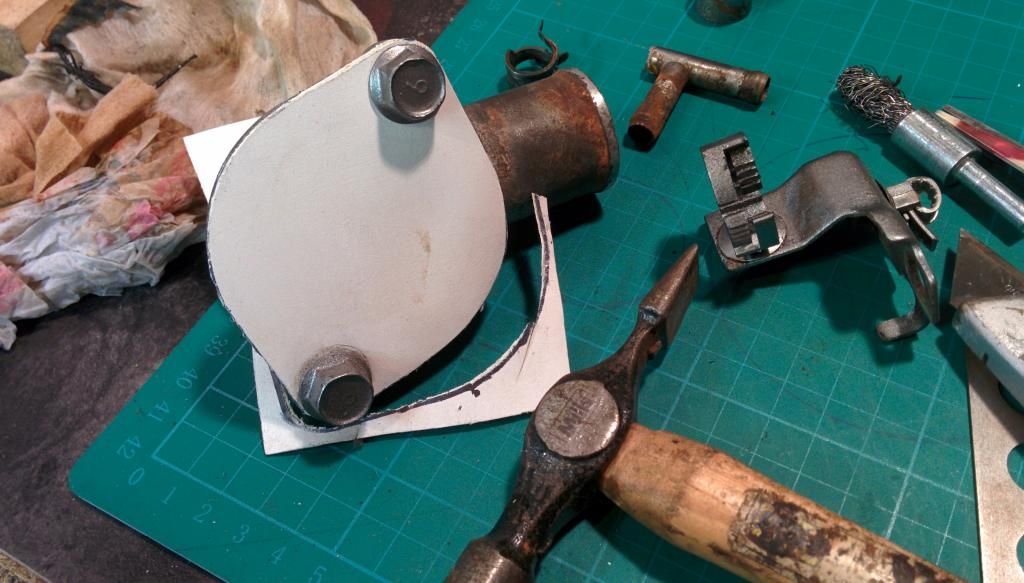
So...time for pics.
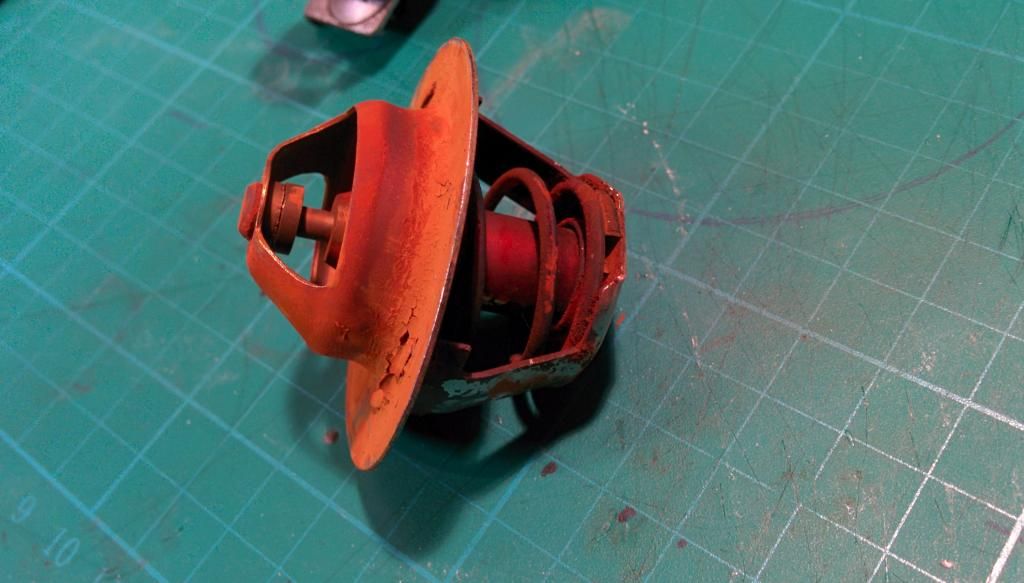
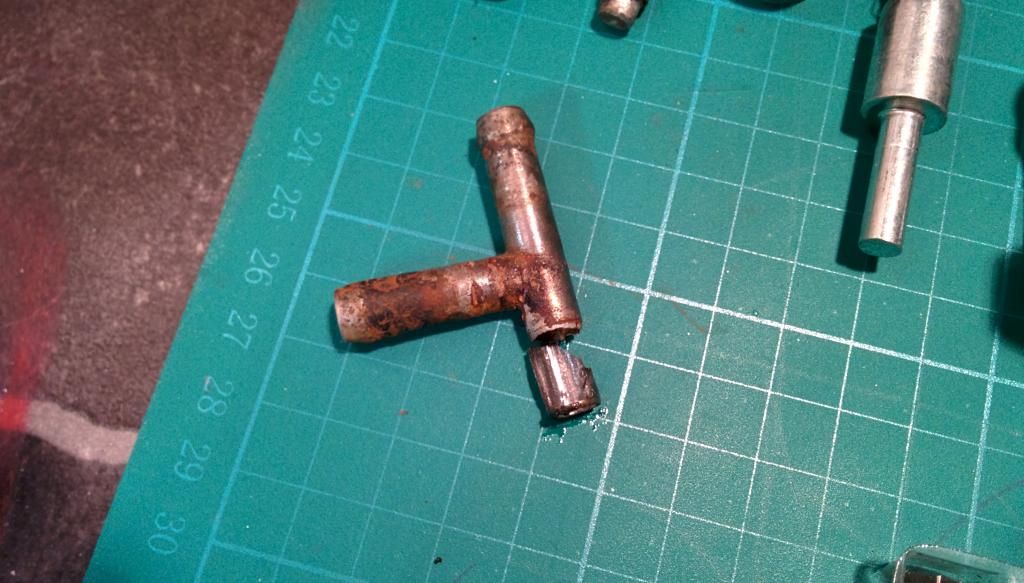
All apart...the t-piece just snapped off it was so weakened.
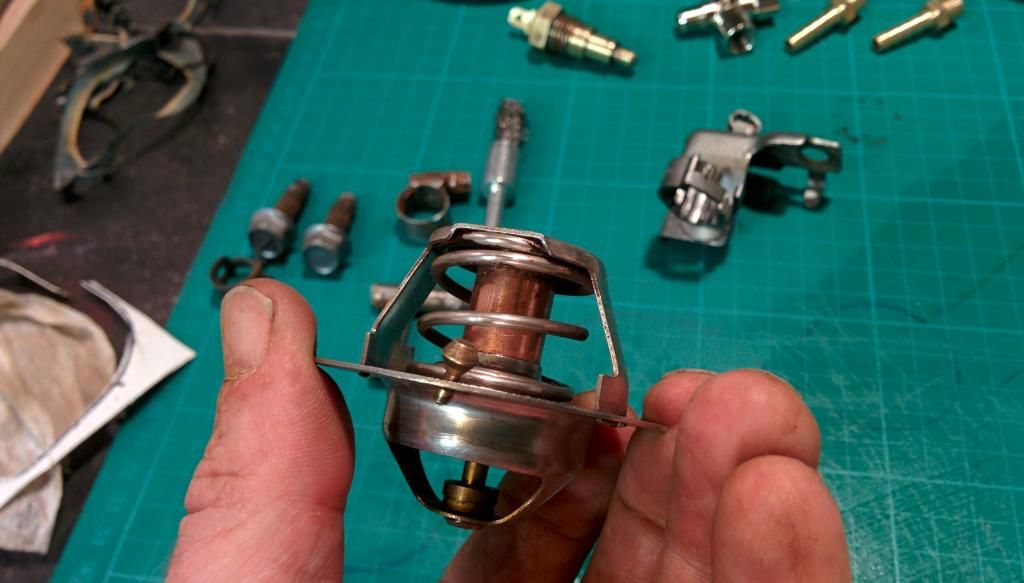
The new pieces:
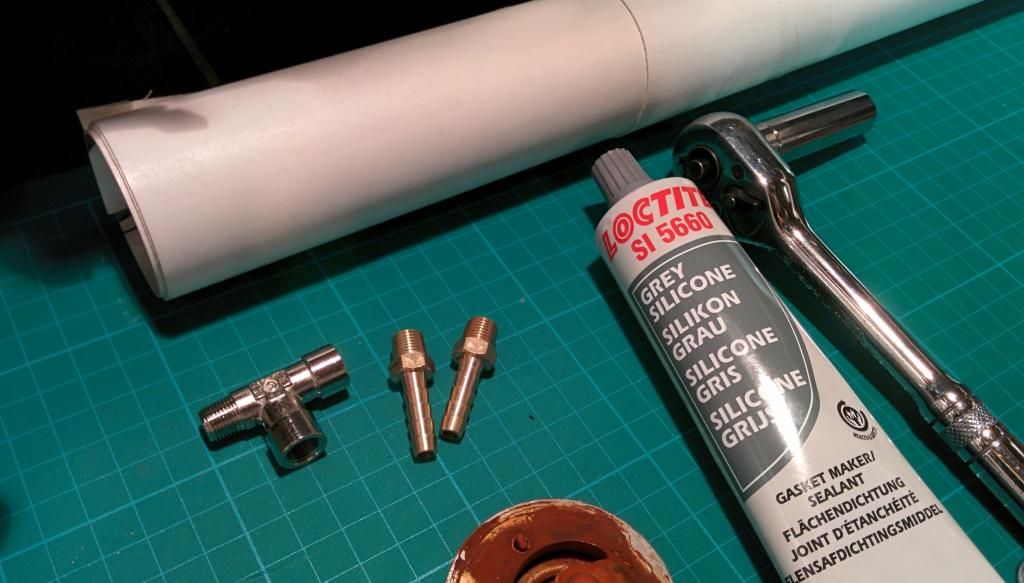
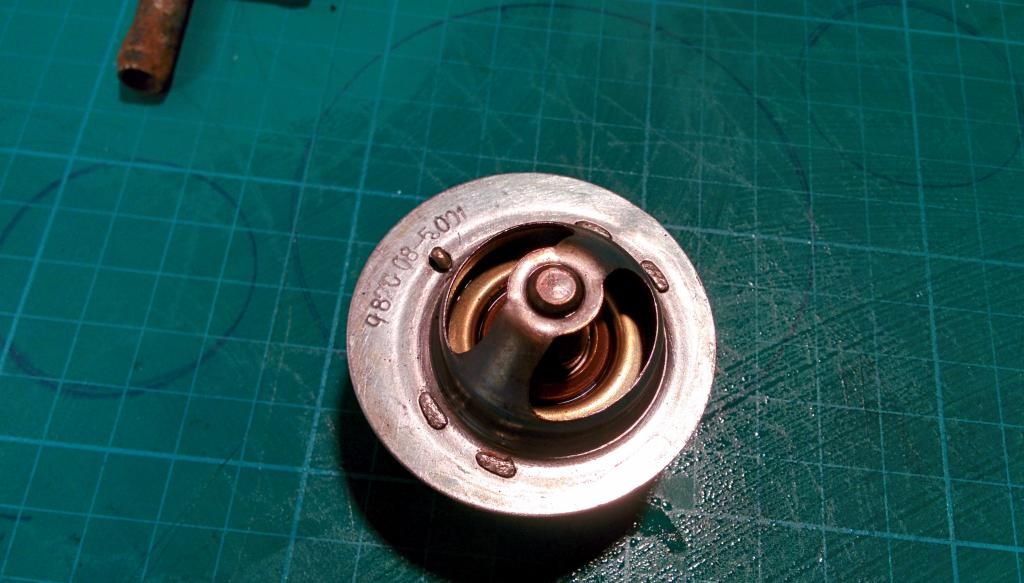
Prepped and ready to go...
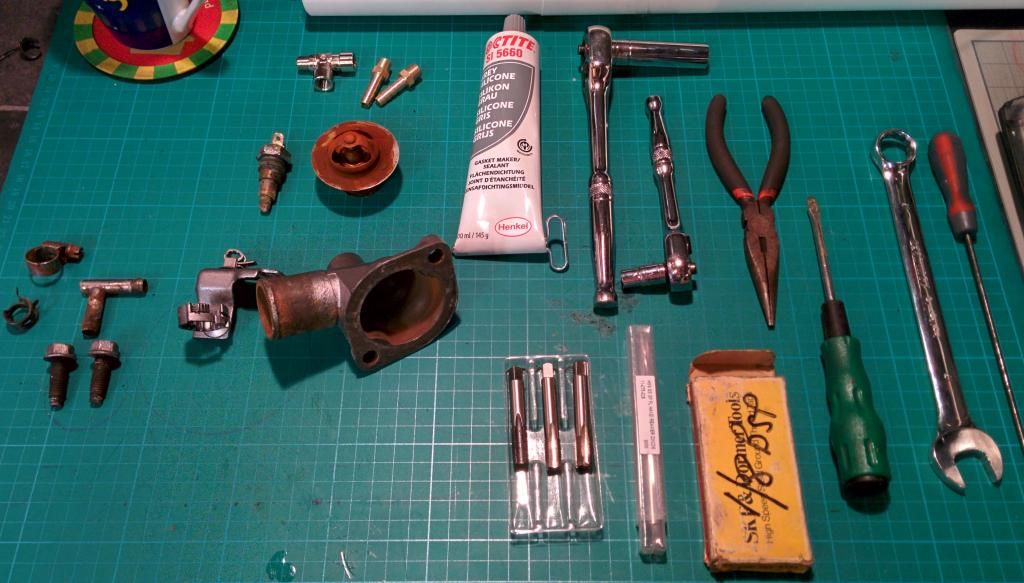
Cover that hole up...don't want any swarf in there.
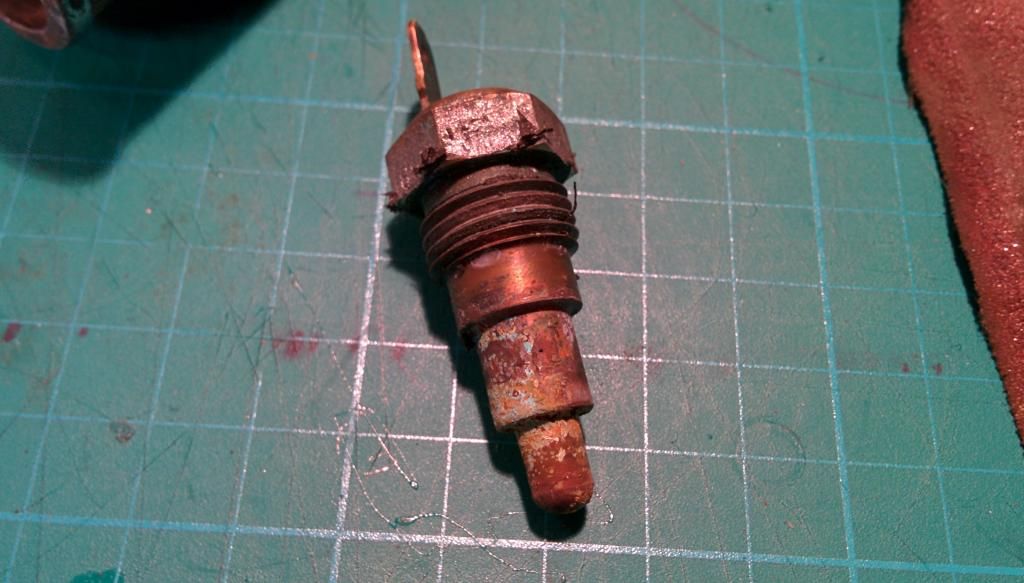
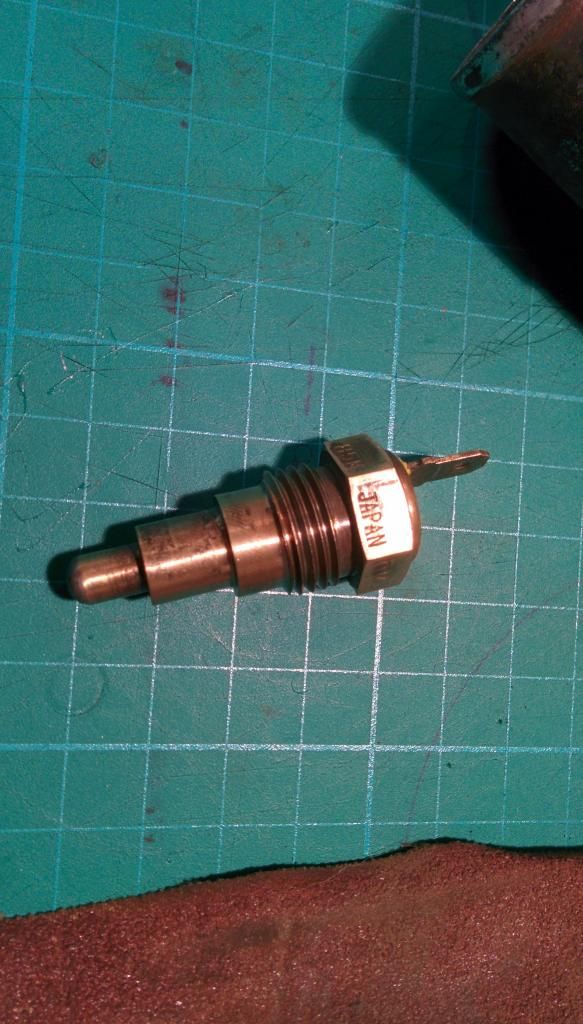
Procrastinate... let's clear up the sensor first
I got a roll of super gasket paper from work - this is for high pressure pipewirk, 0.75mm thick. Lovely jubbly, so lets make a gasket with a hammer: Tap away..
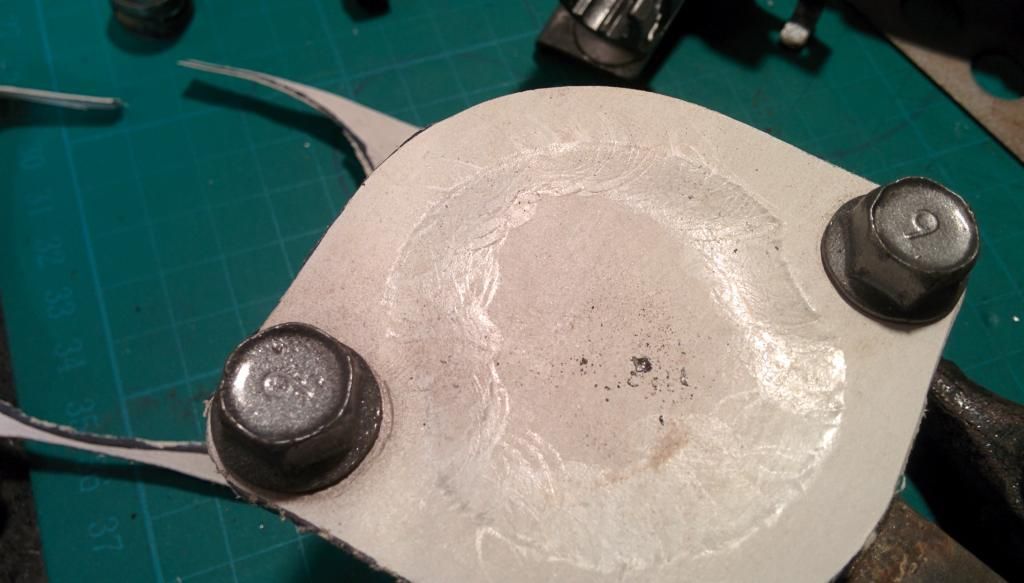
Done:
Hmmm - procrastinate some more....
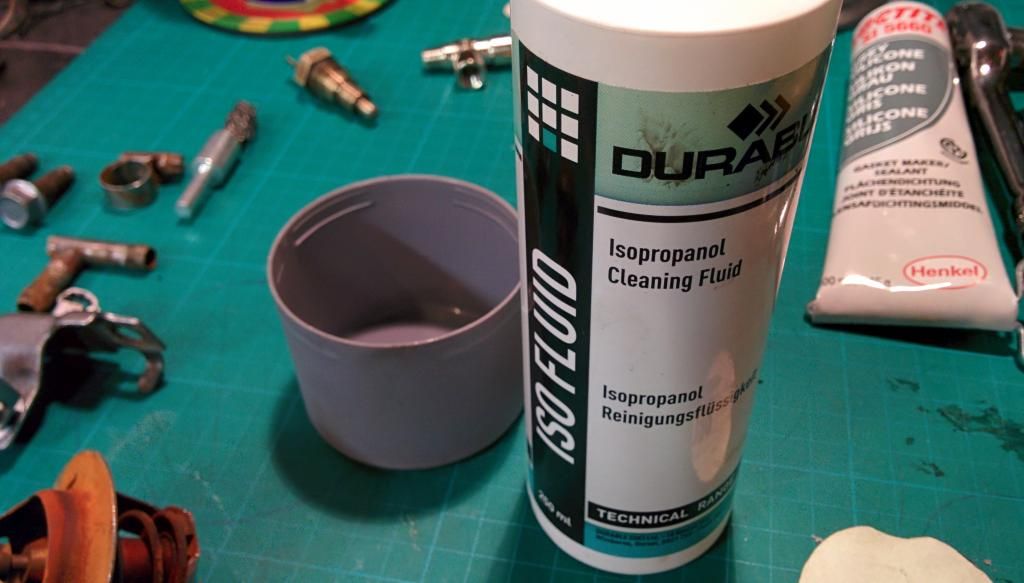
Step forward ISO fluid
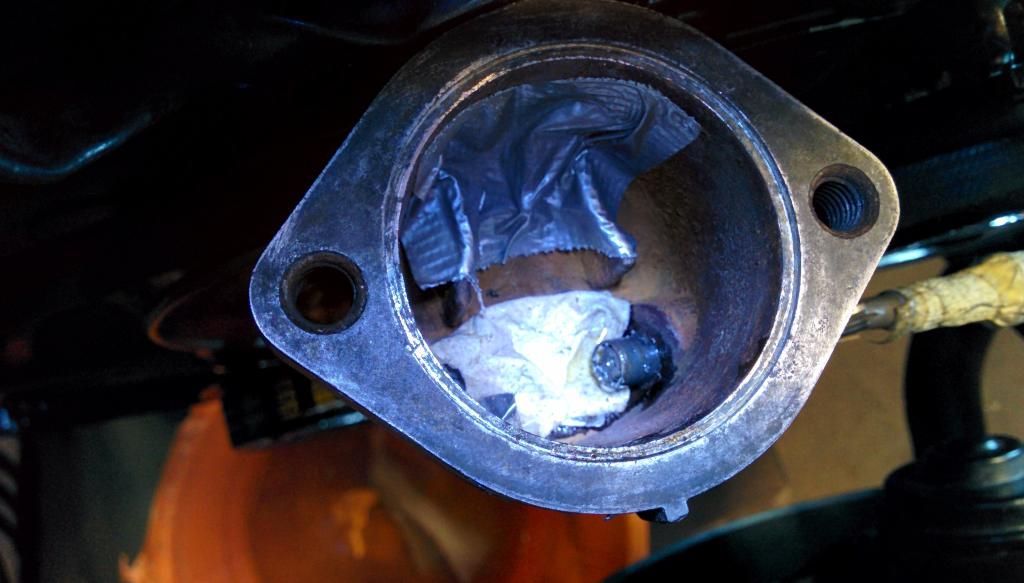
Can't put off any longer... let's start hand reaming...
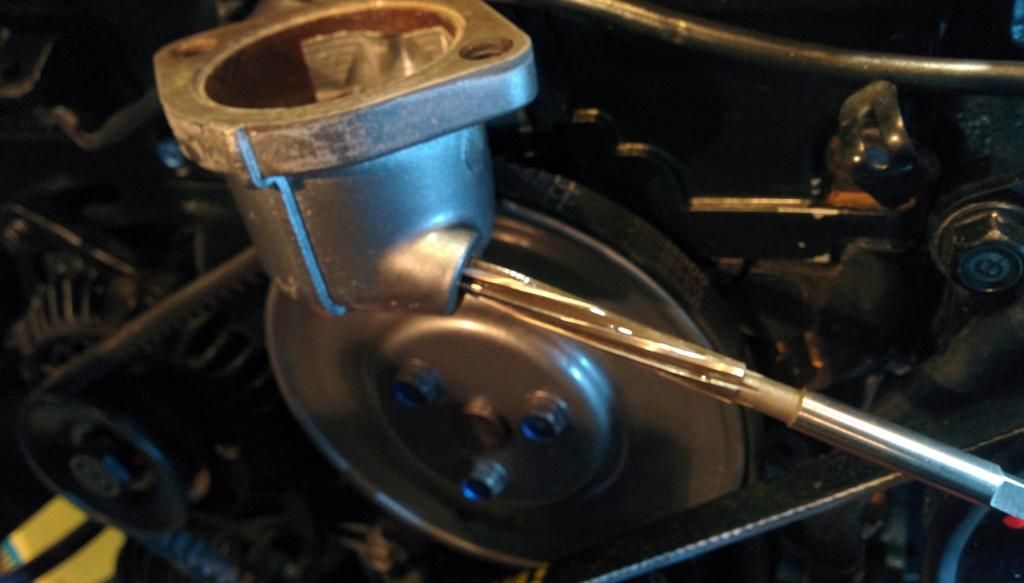
Half an hour later and I have got this far!!
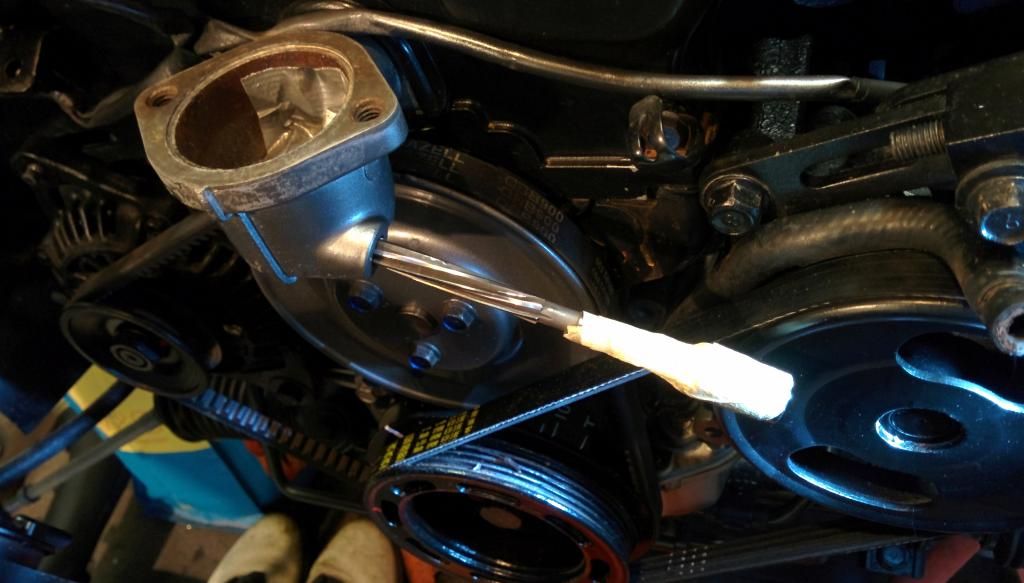
55 minutes in and my fingers arekilling me... masking tape needed here:
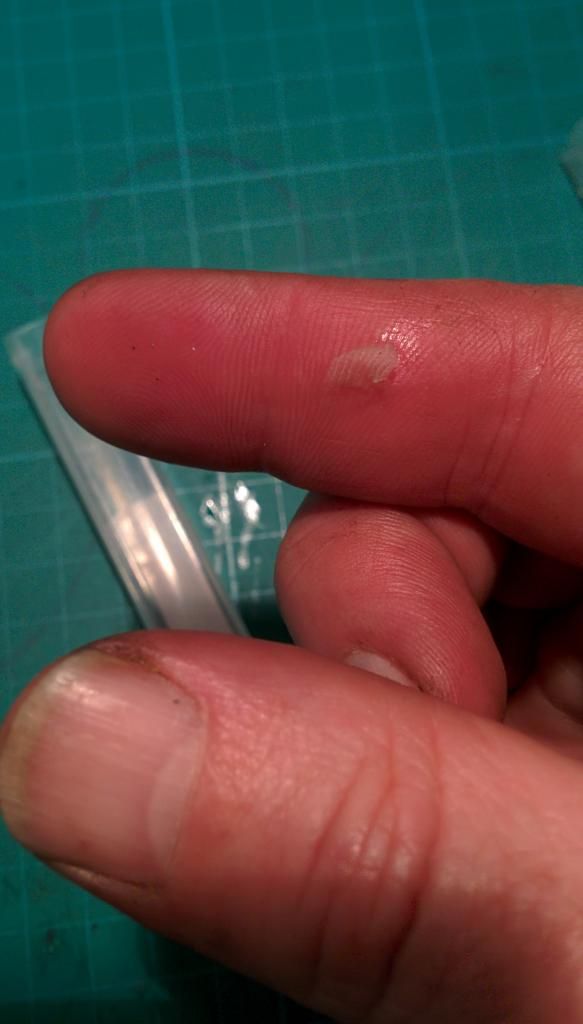
1 hour...blisters are appearing...ouch
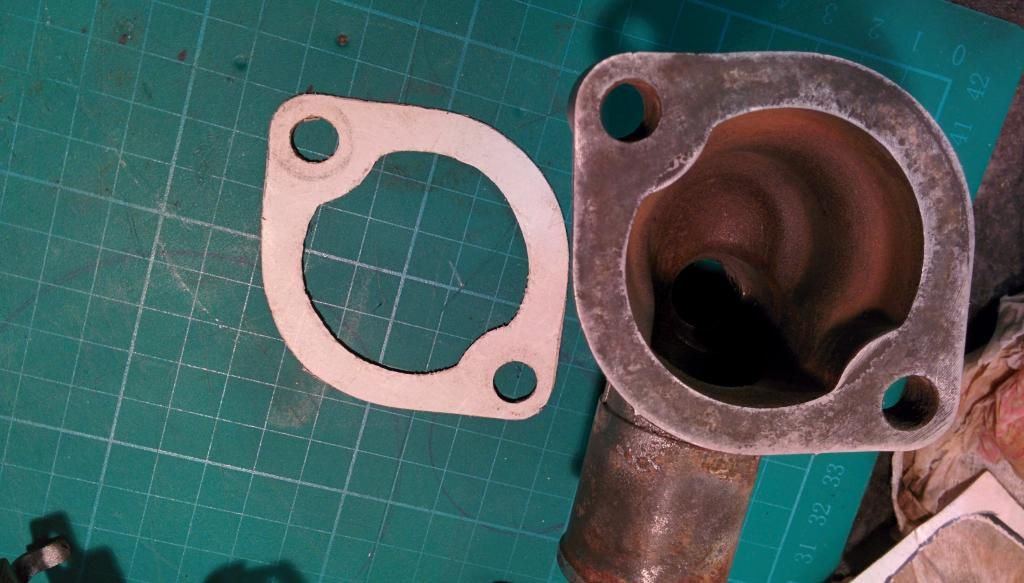
1 hour 20 mins..nearly there...
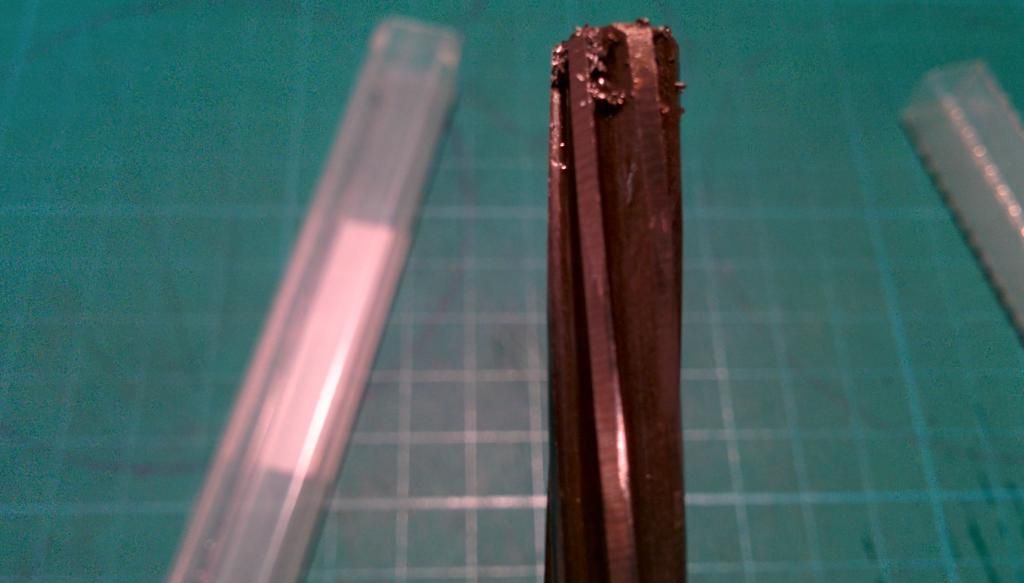
1 hour 35 minutes...breakthrough. That bit you can see is the other half of the t-piece!
Wooo...
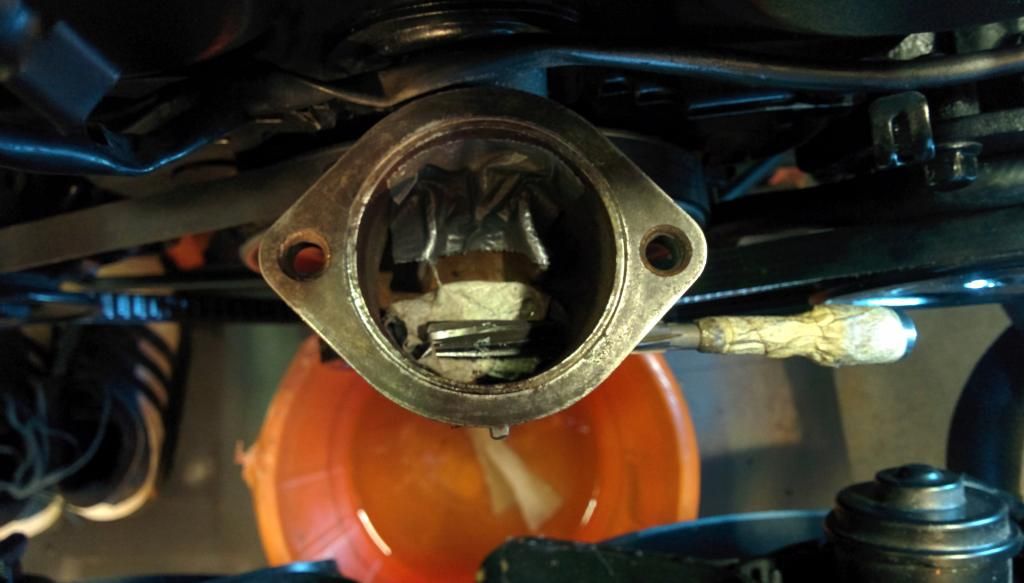
Now time to tap...with blistered fingers.... not much in the way of pics now, as I was cursing something rotten at this time, but determined to finish.

1 hour and 5 minutes later... bingo :) I don't know what alloy this housing is made from, but it is so damned hard!!
Tired, throbbing fingers now, put the sensor in and seal it and bugger off to bed!!

We will see tomorrow if it has worked. Worth the pain for a £5 fix if it does. If not... £70!!
I am not spending £70 for a naff piece of metal.
£5 later, I am ready to diy. Now I could take the whole front of the engine apart again to get the housing off...but If I am doing that I may as well buy new..... so fix insitu.
As there is no room for any kind of tools, this was going to be a case of just fingers.
Firstly I have decided to use a 18th bsp t piece - which means reaming the hole and then tapping the hole in the housing...I will use a hand reamer... and when I say hand reamer, I literally mean...by hand - fingers and thumbs only!
So...time for pics.
All apart...the t-piece just snapped off it was so weakened.
The new pieces:
Prepped and ready to go...
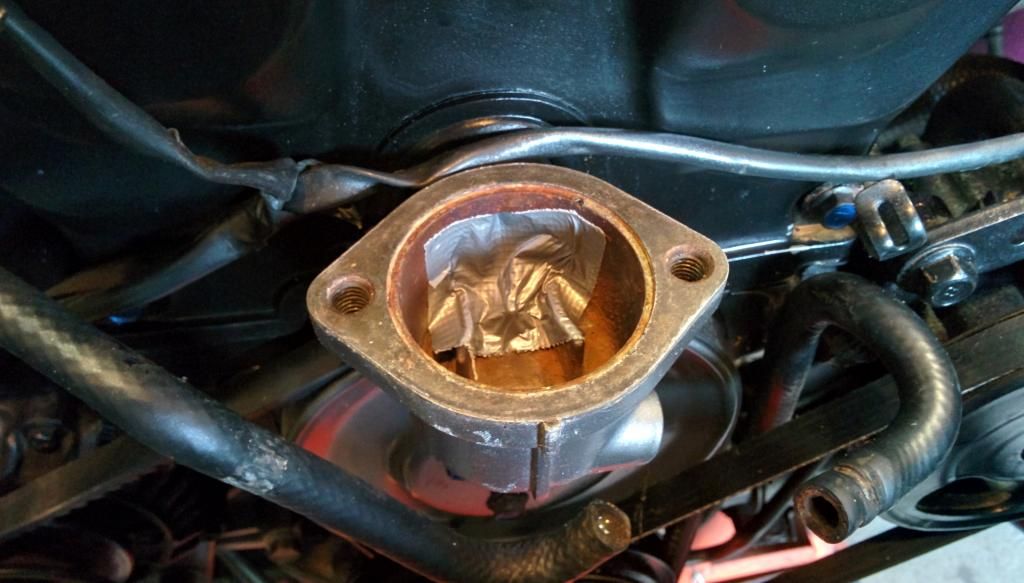
Cover that hole up...don't want any swarf in there.
Procrastinate... let's clear up the sensor first
I got a roll of super gasket paper from work - this is for high pressure pipewirk, 0.75mm thick. Lovely jubbly, so lets make a gasket with a hammer: Tap away..
Done:
Hmmm - procrastinate some more....
Step forward ISO fluid
Can't put off any longer... let's start hand reaming...
Half an hour later and I have got this far!!
55 minutes in and my fingers arekilling me... masking tape needed here:
1 hour...blisters are appearing...ouch
1 hour 20 mins..nearly there...
1 hour 35 minutes...breakthrough. That bit you can see is the other half of the t-piece!
Wooo...
Now time to tap...with blistered fingers.... not much in the way of pics now, as I was cursing something rotten at this time, but determined to finish.
1 hour and 5 minutes later... bingo :) I don't know what alloy this housing is made from, but it is so damned hard!!
Tired, throbbing fingers now, put the sensor in and seal it and bugger off to bed!!
We will see tomorrow if it has worked. Worth the pain for a £5 fix if it does. If not... £70!!
Regards, Hammy.
1990 Eunos 1.6 Classic Red, soon to be a different colour
1990 Eunos 1.6 Classic Red, soon to be a different colour
-
Mazda Mender
- Site Admin
- Posts: 15097
- Joined: Tue Dec 06, 2011 6:18 pm
- Location: Pie land, in the glen of Wiganshire
- Contact:
Re: Car-19 and the road to recovery
Could you not of drilled the left over T piece out ?,let us know how you get on with this please , this could be a very important fix, as this could also cover the L piece off the water pump out let pipe to.
M-m
The Disclaimer:-
This post is a natural product made from recycled electrons. The slight variations in spelling and grammar enhance its individual character and beauty and in no way are to be considered flaws or defects, the articles/answers/comments are provided for information purposes and they are not intended to substitute informed professional advice, I or mazdamenders.net cannot personally be hold responsible for any damage occurred from following this procedure or any injuries from it. Proceed at your own risk.
Mk 1 Eunos 93 black V.S II 1.8 ,
Mk 2 .1/4 Roadster 99 black & gold V.S 1.8 .
Mk 1 Eunos 90 1.6 soul red ..f/ build
MK 2.1/4 Blue V.S Roadster 1.8 99 ..
MK1 1.8 ,white import.. (Ashleighs)
MK1 1.6 yellow J ltd import.f/build
MK 1 1.8 black Tokyo Ltd..f/build
http://www.mx5oc.co.uk/ http://www.mx5nutz.com/forum/ http://miata.net/ http://www.autolinkuk.co.uk/
This post is a natural product made from recycled electrons. The slight variations in spelling and grammar enhance its individual character and beauty and in no way are to be considered flaws or defects, the articles/answers/comments are provided for information purposes and they are not intended to substitute informed professional advice, I or mazdamenders.net cannot personally be hold responsible for any damage occurred from following this procedure or any injuries from it. Proceed at your own risk.
Mk 1 Eunos 93 black V.S II 1.8 ,
Mk 2 .1/4 Roadster 99 black & gold V.S 1.8 .
Mk 1 Eunos 90 1.6 soul red ..f/ build
MK 2.1/4 Blue V.S Roadster 1.8 99 ..
MK1 1.8 ,white import.. (Ashleighs)
MK1 1.6 yellow J ltd import.f/build
MK 1 1.8 black Tokyo Ltd..f/build
http://www.mx5oc.co.uk/ http://www.mx5nutz.com/forum/ http://miata.net/ http://www.autolinkuk.co.uk/
Re: Car-19 and the road to recovery
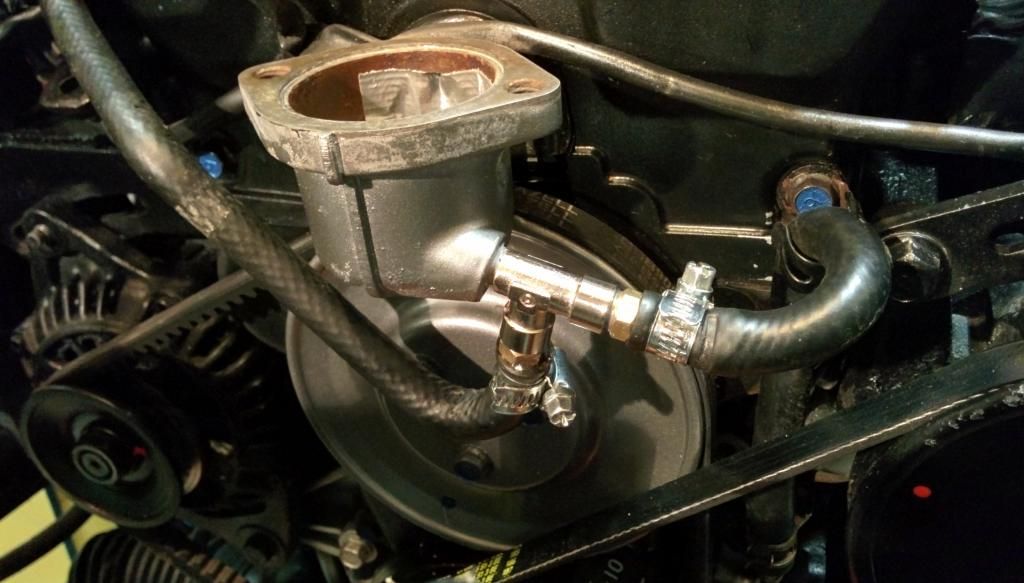
It worked and worked very well....no leaks at all :) I am just uploading a video now.... and Car-19 sounds SO SWEET after the top end rebuild.
Because I did it in place...there is absolutely no room to get power tools in...even a flexi drive. The problem is is keeping the reamer square on - and there is nothing so sensitive or useful than bare hands.... if it was to be done on bench, it would be easier and a power tool/drill could be used. I had to use a reamer due to limited space.
Because I did it in place...there is absolutely no room to get power tools in...even a flexi drive. The problem is is keeping the reamer square on - and there is nothing so sensitive or useful than bare hands.... if it was to be done on bench, it would be easier and a power tool/drill could be used. I had to use a reamer due to limited space.
Regards, Hammy.
1990 Eunos 1.6 Classic Red, soon to be a different colour
1990 Eunos 1.6 Classic Red, soon to be a different colour
Re: Car-19 and the road to recovery
Good job
Eunos 1.6 special 1989 with a few added extras
Eunos 1991 1.6
Eunos 1990 1.6 project
Mk2 1999 1.8
Eunos 1991 1.6
Eunos 1990 1.6 project
Mk2 1999 1.8
Return to “Members Mx-5/ Roadsters”
Who is online
Users browsing this forum: No registered users and 12 guests
