What you put in, you'll get back ten fold
***** THIS IS VERY IMPORTANT TO THE SITE AND HELPING YOU,OTHERWISE IT CLOSES AND ALL THIS ON LINE GARAGE IS GONE FOR GOOD*****

Greetings and welcome to menders, this site was built for every owner that might need her to help keep those bills low and also keep them on the road where they belong, she is run by very passionate enthusiasts owners for passionate enthusiastic owners, see her like a on line garage, there is a lot of tech stuff hopefully explained for everyone to use, if there is something you cannot get your head around, or you feel that there is a strong walk through guide missing that needs creating by one of us or from yourselves, please let us know, we are also on false book and youtube, which as short tech vids to help, and again if you feel there is a vid that would help please get it touch.
the menders is free, but like everything there is a cost to run things and bills( we are just happy its not a heating cost), so if we have saved you hundreds, please throw a small donation in the pot so we can keep on going to carry on helping others in the same way .

*** we are currently looking for a sponsor for this year, so if you have the passion and can see this sites worth to everyone , please get in touch and step forward to help***

And thank heavens that we are now on the way back up the brighter ,warmer longer days, "come on summer", and lets see those project builds.


M-m

Mx-5 Mk 3 Rx8 varible speed wiper stalk upgrade

User avatar
Mazda Mender
Site Admin
Posts: 15089
Joined: Tue Dec 06, 2011 6:18 pm
Location: Pie land, in the glen of Wiganshire
Contact:

Mx-5 Mk 3 Rx8 varible speed wiper stalk upgrade

Postby Mazda Mender » Mon Nov 03, 2014 11:34 pm

This is an easy job, even for the inexperienced to install a Variable Wiper stalk to your Mk 3's


Items required are.....
1x long shafted no2 Philips Screw Driver.
1 x RX8 wiper Stalk ( the bay of e and the like )

Underneath the steering column shroud locate the recesses with screws in them, remove the screws. Two are self tappers, one is threaded (The threaded one is in the deep recess).
Remove the shroud by separating the Two halves.

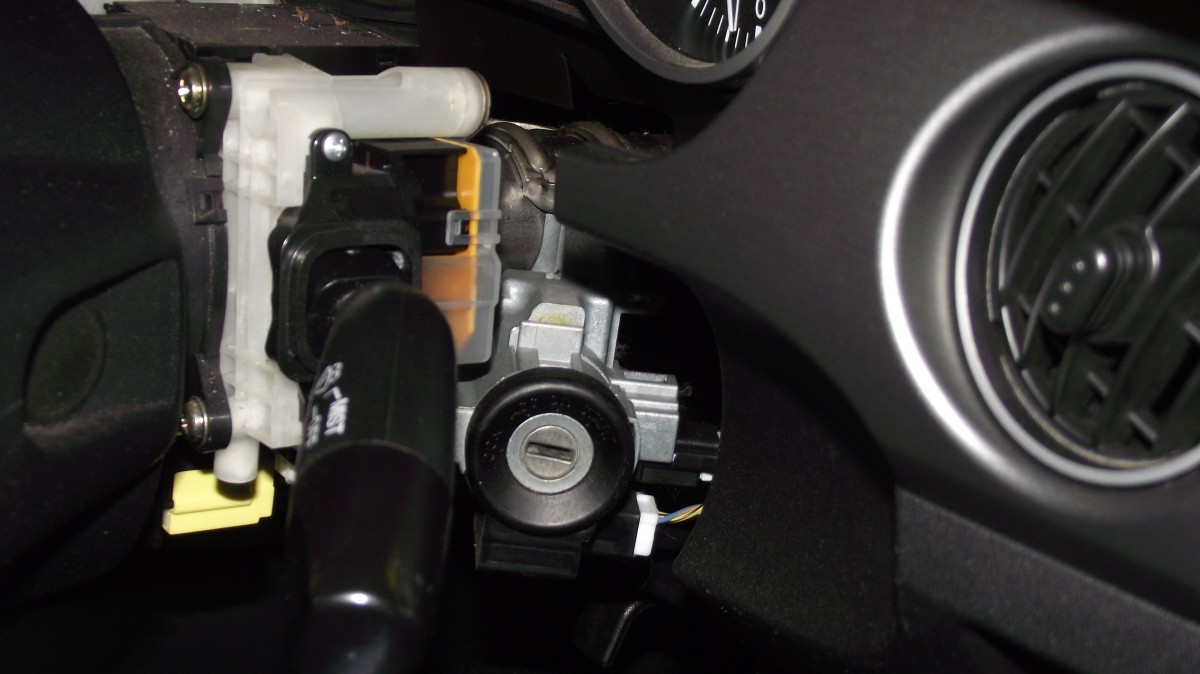
You will see one screw above the stalk and one below, remove these and pull away the stalk and unplug the electric plug.

Reverse order to reassemble, it is just as easy as that pictures below for reference.

DSCF0190.JPG
DSCF0190.JPG (116.06 KiB) Viewed 4584 times


DSCF0189.JPG
DSCF0189.JPG (192.94 KiB) Viewed 4584 times


DSCF0186.JPG
DSCF0186.JPG (120.09 KiB) Viewed 4584 times


DSCF0187.JPG
DSCF0187.JPG (119.68 KiB) Viewed 4584 times


More detail in the video

https://www.youtube.com/watch?v=TwN5kGJaPXc

Submitted by:-Richard N
The Disclaimer:-
This post is a natural product made from recycled electrons. The slight variations in spelling and grammar enhance its individual character and beauty and in no way are to be considered flaws or defects, the articles/answers/comments are provided for information purposes and they are not intended to substitute informed professional advice, I or mazdamenders.net cannot personally be hold responsible for any damage occurred from following this procedure or any injuries from it. Proceed at your own risk.


Mk 1 Eunos 93 black V.S II 1.8 ,
Mk 2 .1/4 Roadster 99 black & gold V.S 1.8 .
Mk 1 Eunos 90 1.6 soul red ..f/ build
MK 2.1/4 Blue V.S Roadster 1.8 99 ..
MK1 1.8 ,white import.. (Ashleighs)
MK1 1.6 yellow J ltd import.f/build
MK 1 1.8 black Tokyo Ltd..f/build


http://www.mx5oc.co.uk/ http://www.mx5nutz.com/forum/ http://miata.net/ http://www.autolinkuk.co.uk/

Return to “Electrics”

Who is online

Users browsing this forum: No registered users and 1 guest